Vegetarian Stuffed Mushrooms ~ ElephantEats.com

We headed down to my mother-in-law’s for the long Easter weekend. Since Nate was in California for a couple months, we hadn’t been down since Christmas and it was nice to just relax and eat tons of yummy food.

Tired Haley

Nate’s mom totally spoils us and we both got giant Easter baskets filled with our favorite candy. She got me Peeps!!!

Peeps are yummy

We also dyed some Easter eggs. This here is our easter egg family. Do you see the resemblance?

Easter Egg Family

The paw print one was Nate’s representation of L.C….not bad.

But I think my version of Nate was pretty spot on ;)

Easter Egg Beardo

Since Nate’s mom was going to cook a big meal for us for Easter dinner, I decided to make a yummy appetizer for the night before. This is another of those recipe’s from the recipe box I got handed down from my mom. I remember her making these for dinner parties and some catering too.

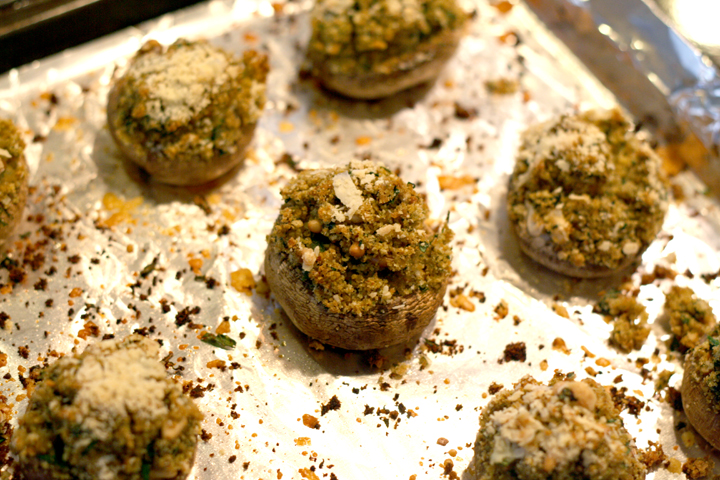
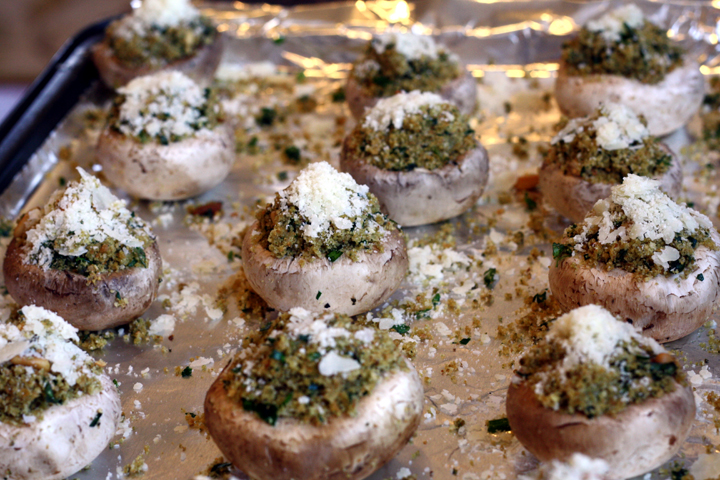
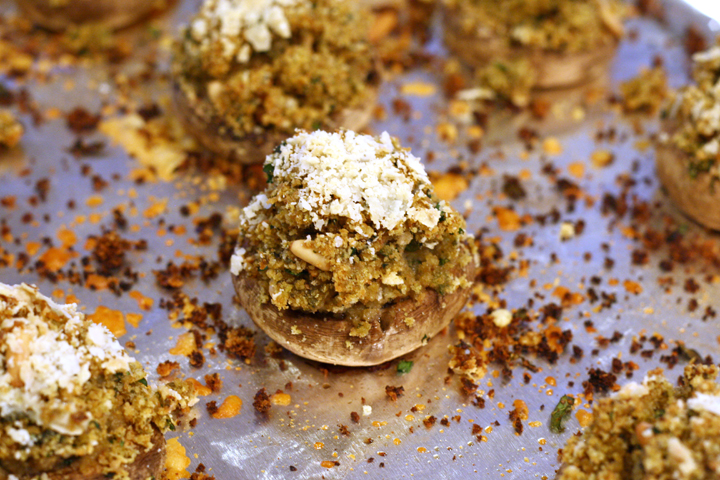
Vegetarian Stuffed Mushrooms ~ ElephantEats.com

They’re super easy to make and only take 10ish minutes to cook! You can totally make them ahead of time and they can sit out til you’re ready…or you can probably even make them the day before if you really want, and just keep them in the fridge.

Definitely keep this recipe on hand for your next dinner party or just to make your weeknight dinner a little fancier :)

Vegetarian Stuffed Mushrooms ~ ElephantEats.com

Stuffed Mushrooms

From mom’s recipe box

Print this recipe!

Serves 8-10 (can easily be halved with no probs)

25-30 lg. mushrooms, stems removed
2 cups sourdough breadcrumbs (i used regular but I think it wasn’t as good)
1/2 cup pesto
1/4 cup pignoli nuts, toasted
3-4 Tbsp fresh parsley, finely chopped
3-4 Tbsp fresh basil, finely chopped
1/2 cup vegetable broth
Parmesan cheese for sprinkling on top

Preheat oven to 400.

Combine crumbs, pesto, nuts, parsley and basil. Slowly mix in broth until moist but not wet. Season to taste with salt and pepper.

Fill Mushrooms. Top with cheese. Bake 10-12 min.

*Must serve hot!*

Valentine Sugar Cookie Heart

Before I get into my Valentine’s Day treats, I wanted to share a couple things with you. If you’ve been following me since the beginning, you know that a couple years ago, I catered lunch for Nate and his little film crew while he filmed a short film he wrote, directed, and acted in. It took a long time to finish editing, but I can finally share it with you. It’s equal parts suspenseful and amusing, and I hope you enjoy it :)

Lost Keys from Nathaniel Carota on Vimeo.

(You can also see the video he made for our wedding here.)

The second thing I want to share with you is another doggy painting I completed. I’m really trying to build up a pet portrait side business (see the “Pet Portrait” tab on my page menu). I really want to expand to animals other than dogs, but so far that’s all I’ve done. This one was done in memory of Charlie, who passed away recently from cancer :(

Custom Pet Portrait Yellow Lab

Custom Pet Portrait Yellow Lab

Now onto the recipe…

I know a lot of people aren’t fans of Valentine’s Day. While it’s true that it’s not as exciting of a holiday if you’re unattached, it’s a perfect excuse to eat chocolate no matter what your relationship status :)

There are a couple cookie recipes I’ve been meaning to share. I’ll share one today and one in a few days. The first is a semi-homemade cookie that I found years ago and often use it for beautiful Christmas Cookies. It’s a cut-out sugar cookie, but because it’s an upgrade to a powdered mix, you can spend more time decorating and less time measuring out ingredients! Also, the texture is such that you don’t even need to refrigerate before rolling out.

Valentine Sugar Cookie Heart

I usually use it with regular royal icing and decorate pretty snowflakes and santas for Christmas. This time, however, I used a super easy marbling technique I found on this site. It’s so easy and sooo impressive looking!

Since I won’t get to be with Nate this Valentine’s Day, I sent him these in a little care package with some toffee blondies. The blondies were a recipe I made for the first time and they were SO good, but I didn’t photograph them, so I’ll have to make them again sometime soon for you.

Make these cookies for someone you love today!

Semi-Homemade Roll Out Sugar Cookies

From Sandra Lee

Print this recipe

makes 4 dozen small cookies or 2 dozen larger

17.5-ounce package dry sugar cookie mix
4 ounces cream cheese, softened
2 eggs
1 teaspoon vanilla extract or other flavoring
1 cup all-purpose flour

royal icing (recipe below)

Preheat oven to 350 degrees F.

Combine the cookie mix with the cream cheese until crumbly. Mix in the eggs and flavoring until well combined. Add enough flour to make a firm dough that can be rolled out. Refrigerate briefly if too sticky.

Roll dough out on lightly floured board to 1/4-inch thickness. Cut out hearts or other desired shapes.

Place on ungreased baking sheet and bake for about 8-10 minutes.

Make royal icing. When cookies are cool, ice cookies by following marble technique found here and here.

Royal Icing

from Annie’s Eats

this might yield slightly more than you need, but it’s better to have too much so you don’t have to match the color when you make more.

Ingredients:
4 cups powdered sugar, sifted
2 tbsp. meringue powder
5 tbsp. water

Combine all ingredients in a bowl. Whisk until the sheen has disappeared and the icing has a matte appearance (or use a stand mixer.

Transfer the contents of the mixing bowl to an air-tight container. This will be the stiffest consistency of the icing, and at this point it is still too stiff to use for decorating.  Add water a very small amount at a time and stir by hand until fully incorporated.  Continue until the icing has reached a consistency appropriate for piping.  (Remember, if you are having any difficulty piping, it is still too thick.  Add a little more liquid and try again.)

Using a pastry bag, pipe around the edges of each cookie.  Let stand so the icing will set.  Make sure to keep the leftover icing covered at all times when not in use so that it does not begin to harden.

Once all the cookies have been edged, transfer some of the remaining icing to a separate air-tight container.  Thin out by incorporating a small amount of water at a time, until the icing drips off the spoon easily when lifted and then smooths in with that still in the bowl.  If you go too far and the icing is too thin, add more sifted powdered sugar to thicken it again.  Once the icing has reached the desired consistency, transfer it to a squeeze bottle (or a plastic bag with a hole in one corner), and flood the area surrounded by the piping on each cookie.  If it does not completely spread to the edges, use a toothpick to help it along.  Pipe on dots in a contrasting color and use a toothpick to drag into hearts. Allow to set.

As I said in my last post, my husband is gone for the next few weeks, and as much as I want to spend every day cooking things I love (that I know he hates), a girl can only eat so much.

And so, while I’m finishing up some leftovers, I’m going to share a tutorial of the signs I made for my wedding.

But first I want to tell you that our wedding is going to be featured on the awesome wedding blog Green Wedding Shoes!!! I’m so so excited. It’s not going to be til March, but I’ll be sure to post the link when it happens.

(Here’s where I shared some wedding photos, in case you missed)
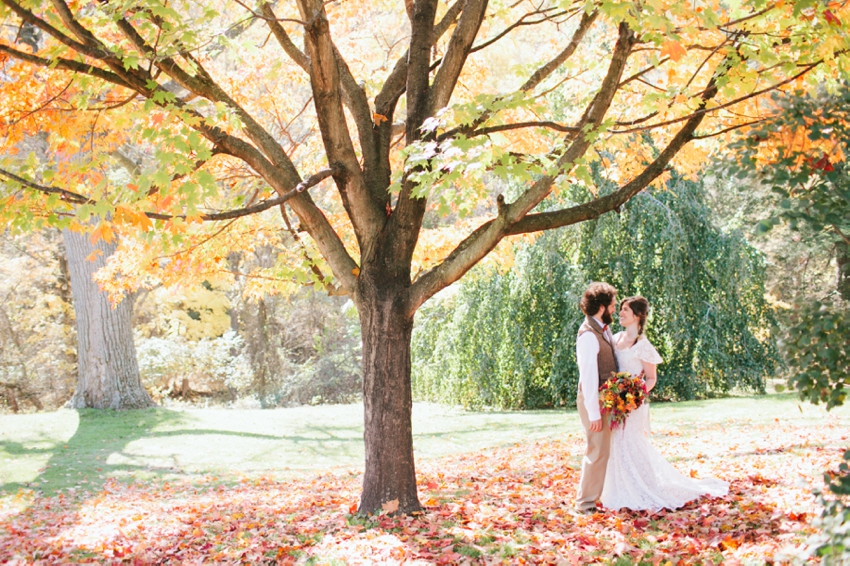
courtesy Jodi Miller Photography

courtesy Jodi Miller Photography

Anyway, I had seen lots of wedding signage around the internet, but I got it in my head that I wanted my signs to be made out of an old picket fence.

Lucky for me, I found one laying on the side of the street on my way home from work one day.  I stood there mentally calculating how to dismember the partially deconstructed fence and then tried to figure out how I’d carry the pieces to my apartment that was a couple blocks away. The superintendent of the building that discarded the fence saw me assessing the goods. I told him that it was for a project for my upcoming wedding,and he asked if I wanted a newer fence he had in the basement.

DIY picket fence wedding signage

courtesy Jodi Miller Photography

I told him that I actually preferred the old, decaying fence to the new one he was offering, and I saw in his eyes that he obviously  took me for an idiot. Despite that, however, he offered to take the old fence apart for me and remove the nails. As he spent the next 15-20 minutes dismembering the fence, he told me that he too was engaged, and that his wife would kill him if she knew he was helping someone else on their wedding project instead of helping with his own wedding :)

I offered to pay him for his troubles but he refused. I walked away with exactly what I had been searching for, and I can’t tell you how happy I was. I think I grinned the whole way home.

If you can’t find an old fence to do this with (which really adds to the rustic charm), I guess you could try distressing some wood yourself, although it’s way more effort. You can easily find people giving away old fences on Craigslist.

Anyway, here’s what I did:

First I went to home depot and got some wooden posts that are 2 in  (i think?) square and like 8-10 feet long. I had home depot cut them for me into sign height. Sorry I don’t have the exact info- I couldn’t find the item on their website. You’ll see it, thought, if you go to their lumber area. It’s basically the smallest size lumbar you’ll see.

I took some walnut stain and brushed it on, then wiped the excess off with a towel. I wanted them to have a brownish finish, so I used Walnut stain. I used a weatherproof spray polyurethane on top, once the stain was dry.

Next, I took the filthy picket fence outside and hosed it down. I wanted it to look weathered, but not dirty. I then let it dry for a day, since the old wood really absorbed the water.
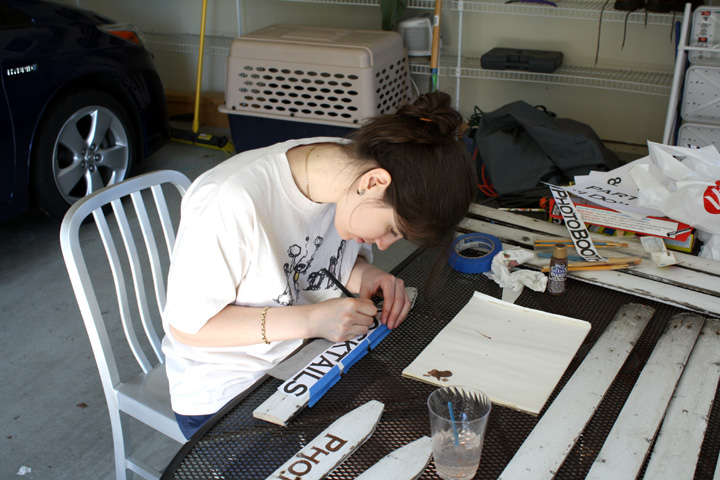
IMG_5907sm

I found a font I liked and printed out the words I wanted so they were almost as tall as the fence was wide- I wanted about 1/4-1/2″ space above and below the words. I placed the longest word I needed on the fence to see how long I should cut them. I centered it and left some room on each side. I then cut all the fence pieces to this length, using a hand saw.

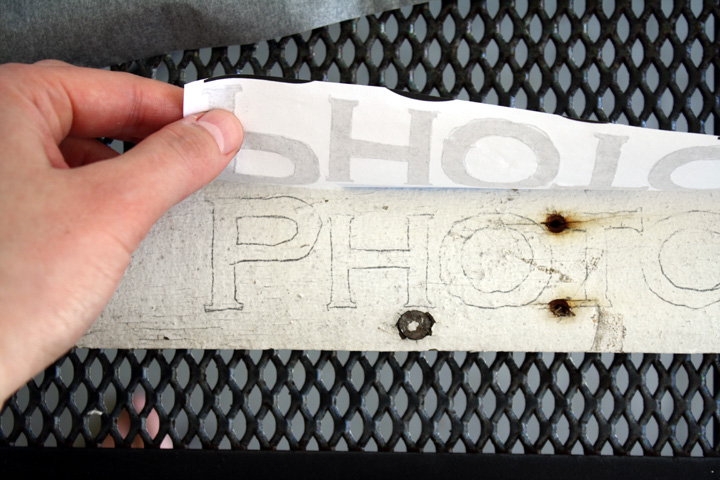
Next I arranged the pieces facing the directions I wanted (depending on where they needed to point in real life), and one at a time I traced over the letters using transfer paper.

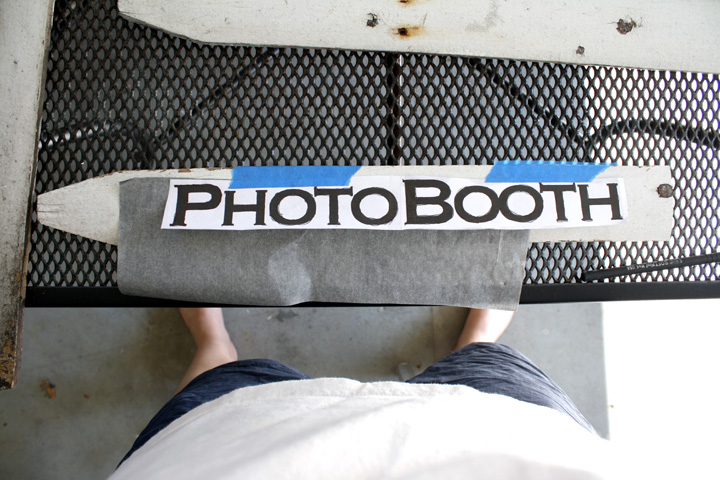
IMG_5903sm

DIY picket fence wedding signage


I then VERY carefully painted within the lines with a teeny brush and some craft paint. I had to go over each letter twice because the paint wasn’t very thick- definitely annoying. If you do this, test the paint somewhere to see it’s coverage and use a more expensive, thicker paint if you can, to save yourself some time.
IMG_5906sm

Once everything was dry, I gave them all 2-3 coats of the weatherproof poly spray, allowing several hours in between each coat. I’m pretty impatient so I probably didn’t wait as long as I should have, but I knew these wouldn’t be outdoors for more than a day, and it most likely wouldn’t rain.

DIY picket fence wedding signage

Then I arranged the signs on each post the way I liked and, since the wood was old and I didn’t want it to splinter, I drilled a pilot hole through both the sign and post. I then screwed them together with some deck screws that were slightly shorter than the fence + post combined thickness.

And, done! I completely love how they turned out :)

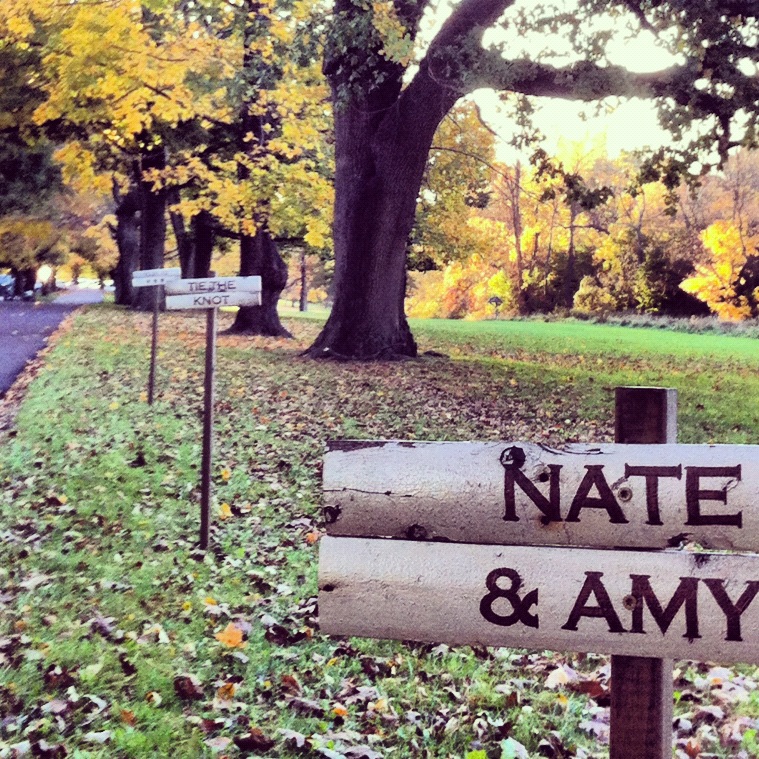
I put several non-directional signs leading down the driveway that said “Amy & Nate” “Tie the Knot” “10-21-12 <3.” They were spaced about 10-20 feet apart.
wedding fence signs

Then I had one directional sign (first picture of the post), since not everything was in the same building.

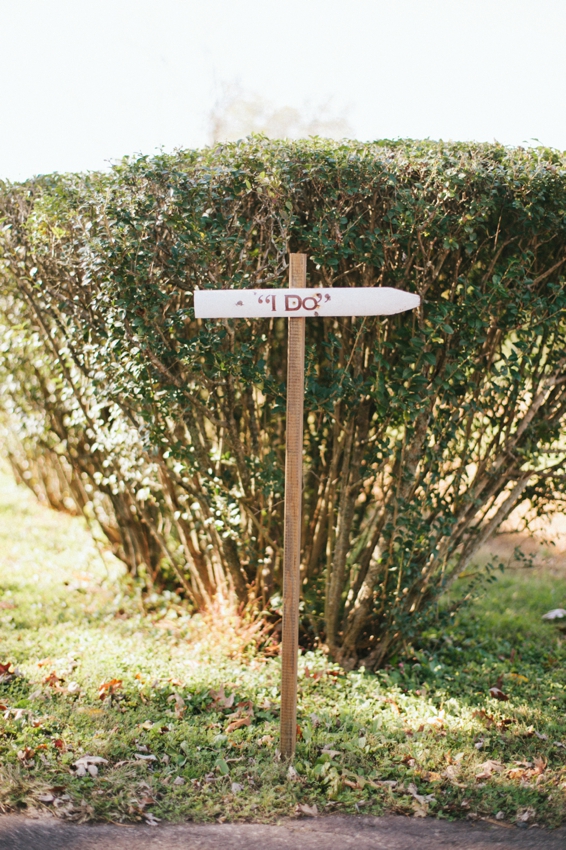
And finally I had an “I Do” sign in front of the orchard where the ceremony was held.
DIY picket fence wedding signage

courtesy Jodi Miller Photography

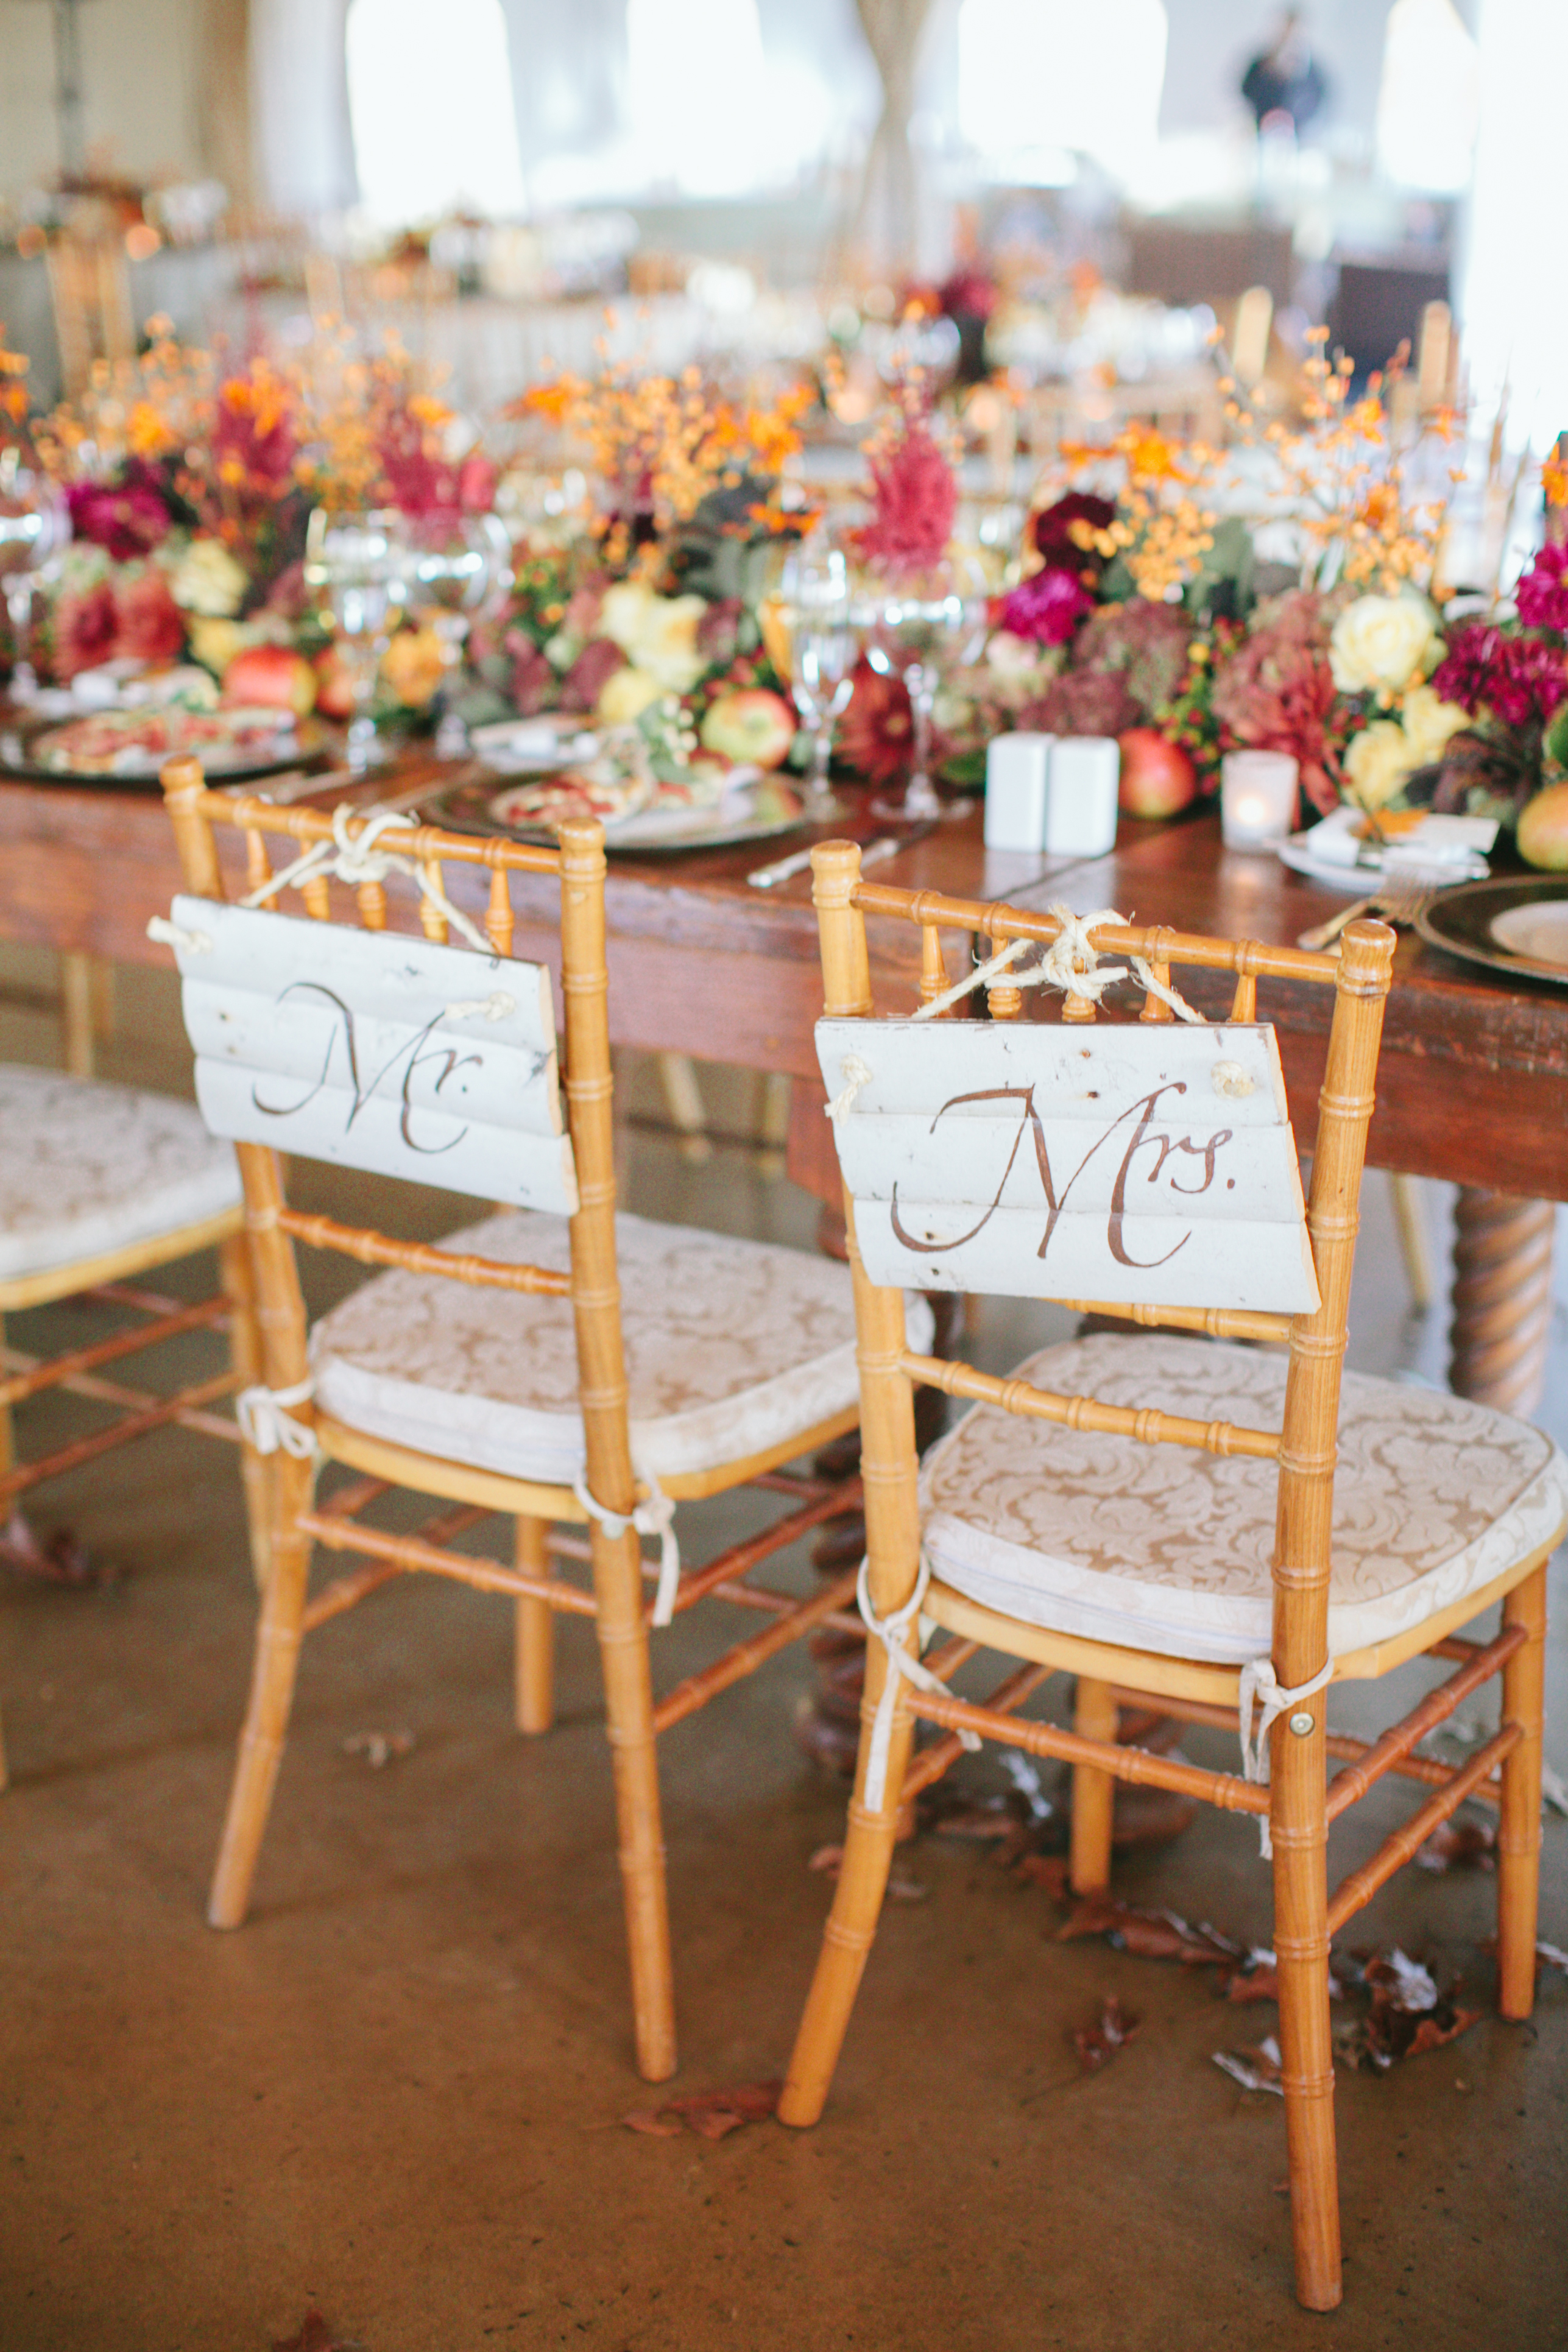
I had so many fence pieces left over that I used them for one more project! Here’s a sneak peek- My how-to will come soon.
Amy + Nate; October 21, 2012; John J. Audubon Center

courtesy Jodi Miller Photography

Gnocci with Spaghetti Squash, Spinach and Rosemary

I’ll have a festive Christmas brunch/breakfast recipe for you soon. Nate and I finally got into the holiday spirit. It’s my first Christmas season as an honorary (by marriage) Christmas celebrator.

Speaking of marriage, we got our wedding photos on cd today! And the photographers sent us one of EVERY photo!!! So so sweet of them. Can’t wait to pick out which we want for our album :)

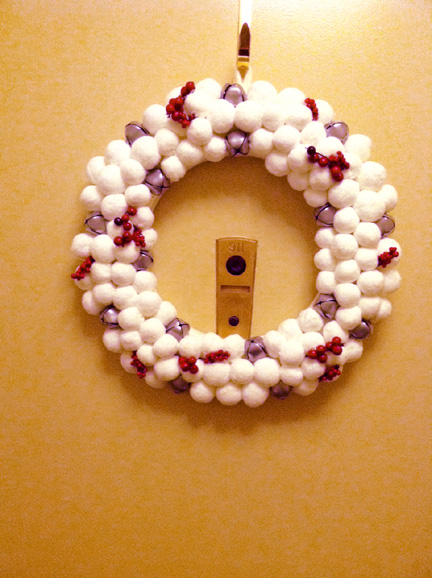
Anyway, the first thing I did for our Christmas decorating was pick up a cute cotton ball and jingle bell wreath from Target. I didn’t want anything too Christmas-y since we are still a multi-holiday household. I thought the wreath was a little too boring though, so I bought a couple different sized berries branches from Michaels and I cut them up and hot glued them on. Muuuch better I think :)

Upgraded Target wreath

We have a tiny apartment and a michievous feline, so we knew we couldn’t get a full-fledged Christmas tree yet. Instead we went to Michael’s to see what we could find. We ended up getting the cutest miniature tree and there were all kinds of mini ornaments and garlands you could get to decorate it!!! Btw, I love anything in miniature. We also picked up a silver reindeer from Home Goods and I broke up some branches to make a little festive setting on our living room mantle dresser.

I have also since pulled out our gorgeous new menorah that we got for a wedding present. I’m so excited to finally have a nice menorah :)

All this holiday decorating was done in preparation for our little cookie-decorating party we hosted this past weekend. Since all my friends who came are cat lovers like us, I baked up some gingerbread cookie paws and cats in addition to the traditional gingerbread men. After we exhausted the possible decorating combos for the paws/cats, we decided to get creative. This was what I came up with:

cat paw cookie turned sideways and upside down!

LC even put on her Christmas best in honor of the party.

a most photogenic feline- photo credit, Erica Harmon :)

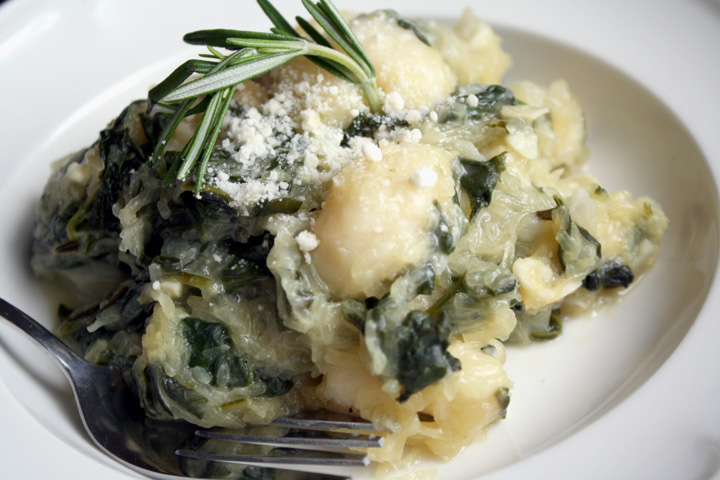
It was a fun weekend. Despite the fact that we both OD’d on cookies throught the day, Nate and I had this delicious gnocchi dish for dinner.

We eat a decent amount of pasta, but I never think to cook gnocchi. It wasn’t until I made this recipe that I realized how quickly it cooks (if you buy it rather than making it) and how much I love it’s chewy texture.

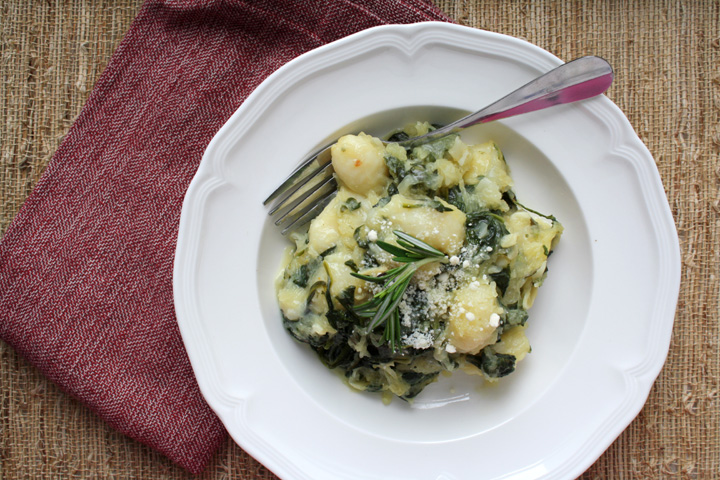
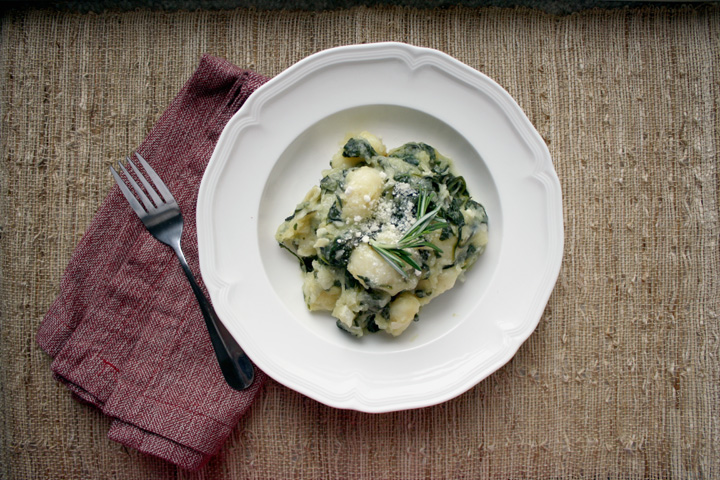
Gnocci with Spaghetti Squash, Spinach and Rosemary

I randomly came across a Food Network recipe and since I didn’t have any of the ingredients, I subbed in my own similar ones and it was a major hit. Nate and I couldn’t stop raving about how delicious it was.

Gnocci with Spaghetti Squash, Spinach and Rosemary

Gnocchi with Spaghetti Squash, Spinach and Rosemary

Adapted from the The Food Network

Print this recipe!

Serves 4

Ingredients
1 small-medium spaghetti squash
2 tablespoons unsalted butter
1 small onion, diced
4 cloves garlic, thinly sliced
1 tablespoon roughly chopped fresh rosemary
1/4 teaspoon red pepper flakes
Kosher salt
1 1/4 cups low-sodium chicken broth or water
11 oz package baby spinach
1 17.5-ounce package potato gnocchi
3/4 cup grated parmesan or pecorino romano cheese

Cut squash in half, remove seeds, and put cut side down in a microwaveble dish. Put 1/4 cup water in bottom of dish, cover with plastic wrap and microwave for 11 minutes (you want it cooked but still slightly “al dente.” Cool til you can handle it and scrape pulp out into a dish.

Melt 1 tablespoon butter in a large ovenproof skillet over medium heat. Add the onion and cook, until soft, about 8 minutes. Add the squash, garlic, rosemary, red pepper flakes and 1 teaspoon salt; cook until the garlic is soft, about 2 more minutes.

Preheat the broiler. Add the chicken broth to the skillet. When it starts to simmer, stir in the spinach and cook until it wilts slightly, about 2 minutes. Add the gnocchi, stirring to coat. Cover and cook until the gnocchi are just tender, about 5 minutes. Uncover and stir in 1/4 cup parmesan and the remaining 1 tablespoon butter. Sprinkle with the remaining 1/2 cup parmesan; transfer to the broiler and cook until golden and bubbly, about 3 minutes. 


I’m back from my honeymoon!…and just in time for a Pinterest Challenge!

I promise I’ll be back with honeymoon details and my regularly scheduled FOOD programming shortly….

Two of my favorite DIY blogs do something every season called a Pinterest Challenge. The goal of the Pinterest Challege, is to make one thing each season that’s inspired by all the gorgeous stuff that we’ve pinned on  Pinterest!

This month, the challenge is hosted by: SherryKatieCarmel, and Sarah

You may remember I participated in this challege last summer and made myself a jewelry holder! I also participated in the winter and made a lovely button bird for Nate’s mom’s Xmas present :)

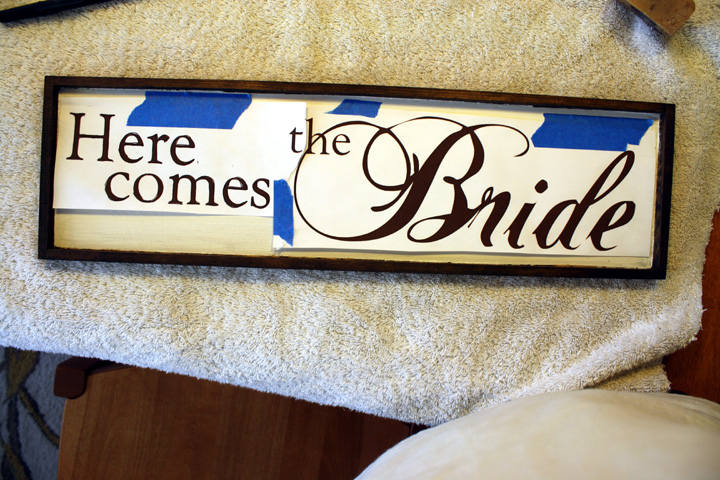
This time around, I had been stockpiling projects from the wedding, which I will be sharing with you over the coming months. But the one I thought I’d share first is my “Here Comes the Bride” sign for our flower girl.

FlowerGirlSign

Before I go into to my inspirations for this project…HOW FREAKING CUTE ARE MY FLOWER GIRL AND RING BEARER?! Omg, I can’t stand it.

Anyway, I knew I wanted to do something different for my flower girl. I had seen these signs around the web and thought it was cuter, and cheaper than going with a basket that my florist was going to charge me for.

These were some ones I saw:

http://pinterest.com/pin/68117013084590660/

 Since my flower girl is only 2 1/2 years old, I knew I needed something light weight. I also wanted something that would be easy to read. I contemplated fabric but it’s a pain to paint on and would flap around if it was windy.

I wanted to use wood but thought it would be too heavy for her to carry. So my first go-round, I got some poster board, and spent an unecessarily long time making it look like wood and then painting the words on it. But when i was done I just wasn’t happy with it. It didn’t look like wood because you could see the styrofoam on the edges. I hated to waste it but I wanted it to be perfect.

So I headed to Michaels to try to find a piece wood that was light enough for a kid to hold. I spent a long time there examining all the options…a LONG time. I tend to have a hard time making decisions. Luckily my aunt was with me to encourage me to pick something.

I found this weird, VERY lightweight piece of framed balsa (?) wood. We asked a random kid at Michaels to hold it to see if it was too heavy but it passed the test! I forgot to take a pic but you can get the idea from the finished product. It was 14.5″ x 17.25″ and is in the section with all their wood frames.

I used photoshop to make the words fit inside the dimensions of the frame and to play around with fonts I liked. After much deliberating (and pestering Nate for his opinion…apparently he doesn’t have one) I made a decision and saved the file as a .jpg. If anyone would like this file as a .psd or .jpg, let me know.

Because a lot of my wedding projects involved an old white picket fence and brown paint, I thought I’d go that same route color-wise.

The first thing I did was stain the back sides and inside edges of the frame with a dark walnut stain I had. I taped off the inside while doing it, put the stain on with a brush and then wiped off excess with a paper towel.

After that dried for a day, I taped off the inside edges and painted the inside main surface with plain old white paint. I had some leftover from a furniture project.

Once the paint was dry, I printed out my letters on two pieces of paper since it didnt fit on one and taped it onto my wood.

The next problem was getting the letter transfered somehow so I could paint them. I didn’t want to freehand it. I had some charcoal transfer paper leftover from my wedding signage project (that I’ll be sharing with you soon), so first I tried that. It was just messy.

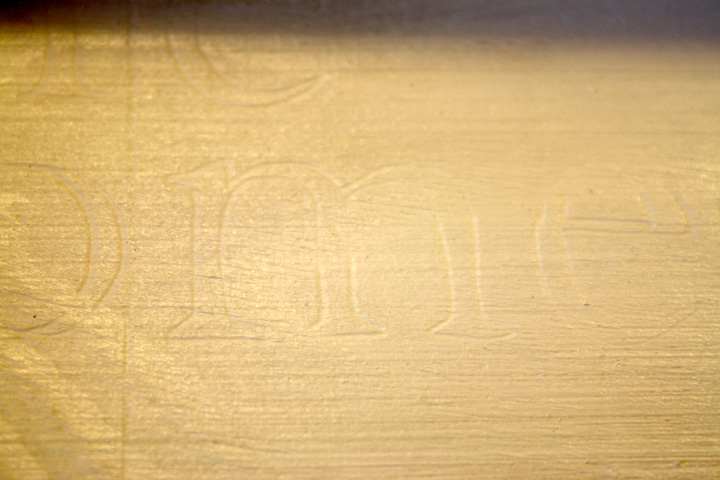
The next thing I tried was something i had seen online. Since the wood was so soft, I just pressed really hard with a pen while tracing all of the letters and a faint outline appeared on the wood.

After I finished this, I went to town with my leftover brown paint and slowly and VERY carefully painting in the lines. I went over everything twice because the craft paint I used was kind of watery.

The painting part wasn’t perfect, but it was definitely good enough.

I’m SO pleased with the result…and especially with my lovely model :) It was worth the time that went into it, which honestly wasn’t all that long.

Also, for a bonus, I won’t be doing a post on the ring bearer pillow I made (also inspired by pinterest), since I just sewed some burlap with lace, but how cute is my ring bearer??

His suspenders, shirt, and khakis match the groomsmen! :)

Here’s another shot of the pillow up close:

P.S. Go check out the owl pumpkin I carved this Halloween and entered in Movita’s Pumpkin Carve-off 2012! It made it to the finals but sadly didn’t win :(