Rainbow Cookies ~ ElephantEats.com

I don’t know if you guys remember, but about a year ago, Nate’s family friend Henny passed away unexpectedly. It’s been weird trying to come to terms with the fact that we won’t ever see him again. We didn’t see him on a regular basis, so it didn’t sink in right away. He used to invite us to his Brooklyn apartment for delicious home-cooked meals every few months so when we hadn’t been there in a while, it hit us that we’d never go there again.

Aside from Henny’s dinner parties, the one tradition we shared was including him in Nate’s mom’s Christmas dinner. I’m not sure when this started as it was before I entered the picture, but he always played a part at Christmas. Henny was Jewish so he didn’t have his own Christmas to celebrate and since Nate’s Christmas is just his immediate family, another guest was always welcome. 

Rainbow Cookies ~ ElephantEats.com

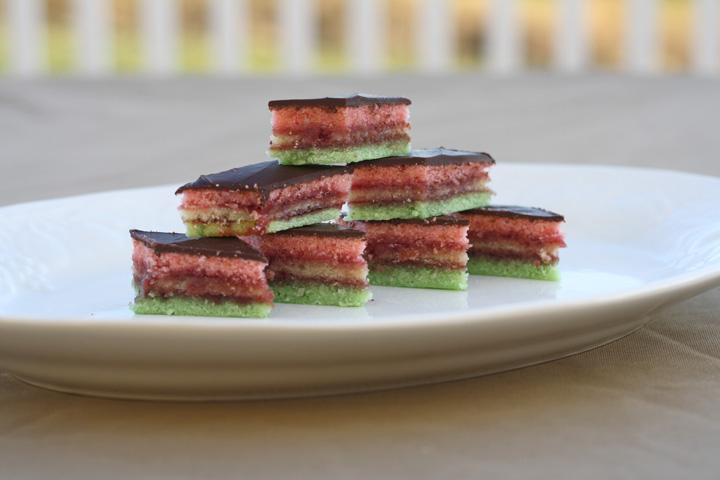
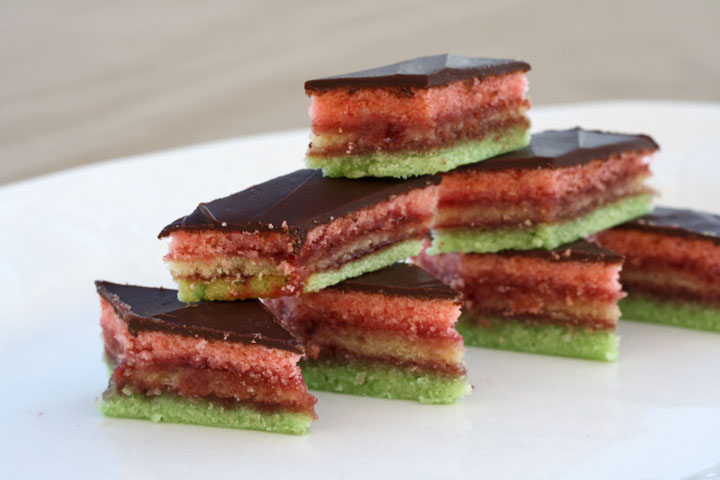
Henny was in charge of cooking the main course, beef and he also brought dessert. This usually consisted of some sort of chocolate cake and his famous rainbow cookies! He used to only make these rainbow cookies at Christmas and we always looked forward to them. He always made enough for us to take leftovers home with us since Nate loves them, and they’re one of my favorites too.

Rainbow Cookies ~ ElephantEats.com

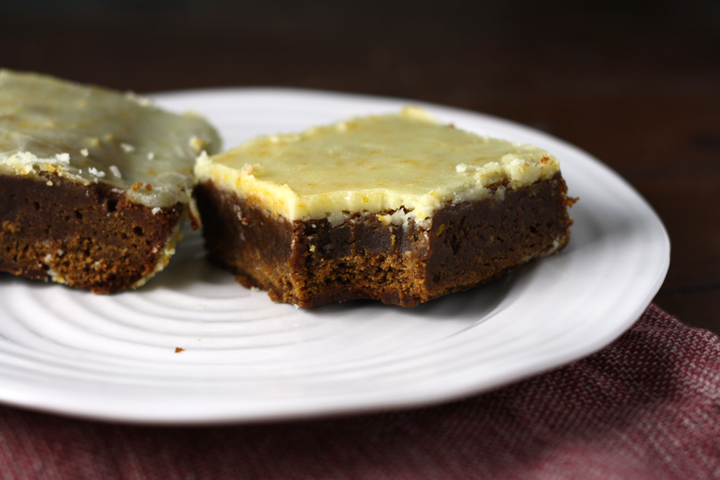
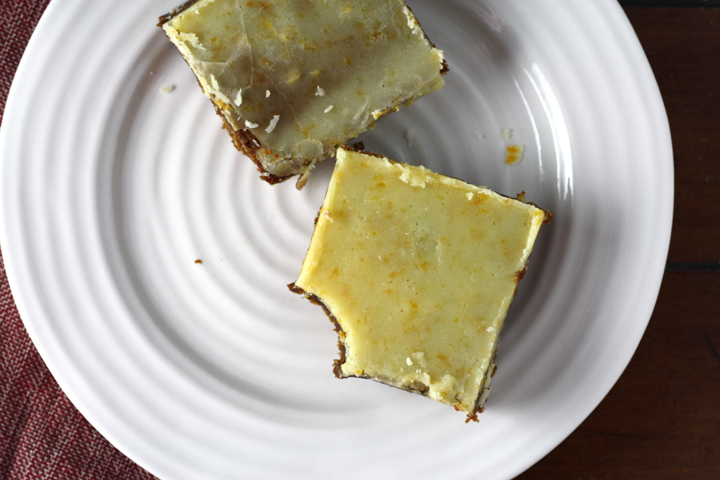
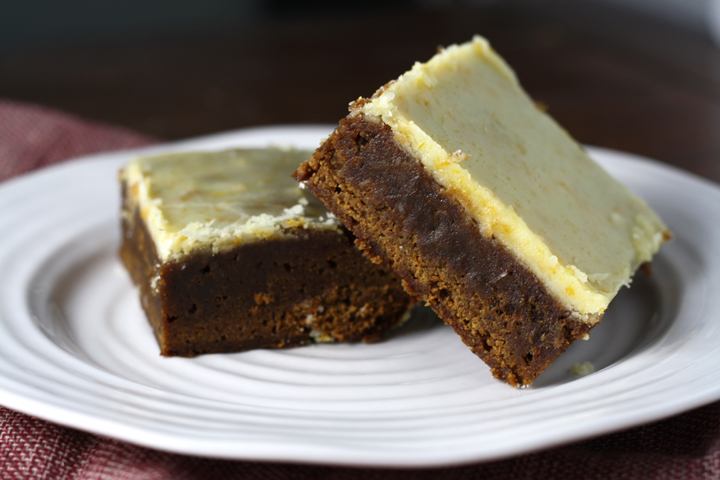
When Christmas was approaching this past year we already knew it was going to be different since Henny wouldn’t be there. Rather than trying to recreate the past and have a crucial part absent, we decided to revamp it. Since none of us actually liked eating beef (we never told Henny this), we decided to go with a vegetarian menu with plenty of sides. Dessert was a Gingerbread Cake with Cream Cheese Frosting (recipe coming soon). But the one tradition we couldn’t omit was Henny’s Rainbow Cookies- it just wouldn’t be Christmas without them.

We emailed Henny’s girlfriend and after some searching through his old recipe collection, she sent us the recipe she thought was the one he used. It was a recipe from a 1999 edition of Gourmet magazine and I followed it to a T. The cookies came out exactly like Henny’s and I know he would be proud. I guess he really was there with us this year in spirit :)

Rainbow Cookies ~ ElephantEats.com

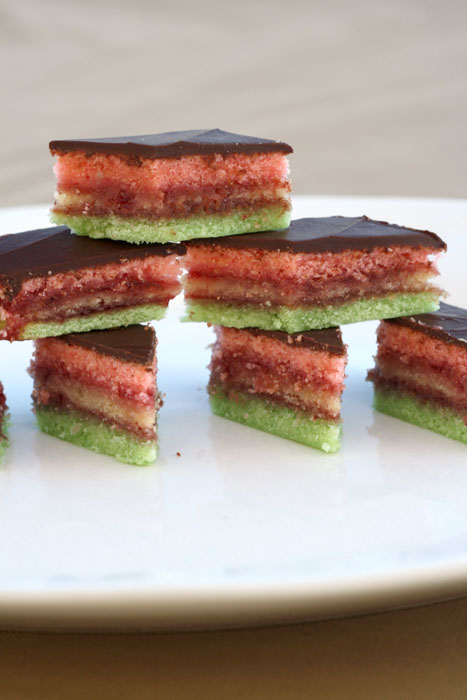
 Since I didn’t change a thing, you can find the recipe online here. I just have a few helpful notes:

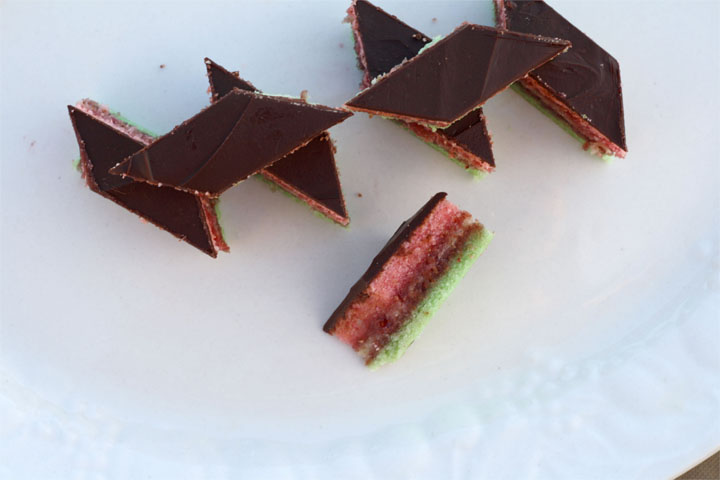
  1. Don’t worry about having the right size pans. These cookies don’t spread at all so you can just line with parchment and draw on the parchment so you know where to spread the batter to.
  2. Use a small offset spatula to spread. It will be really hard to spread it since it’s so thin but just do the best you can. 
  3. Wait to trim the cookies until after you’ve assembled the layers with the jam and they’ve set in the refrigerator. I didn’t do this and the layers shifted so I ended up having to trim then twice. Not a big deal but just figured I’d mention it.

Chunky Pumpkin Spice Granola ~ ElephantEats.com

I had a wonderful couple weeks off of work. I still haven’t caught up on my blog reading and at this point it seems seriously overwhelming….I think I may follow a few too many blogs on feedly but it’s just so hard to eliminate some when there are so many good ones!

For Christmas we went down to Nate’s moms, as I told you guys last week, and I got some great Christmas presents that can be used in the kitchen! I got a scone pan (I’ll let you know how it works), a donut pan (expect a recipe using this when I break it in!), an Alice Waters cookbook and the Flavor Bible. The Flavor Bible is something I read about on another blog and it tells you all kinds of awesome flavor combos to help develop recipes. I can’t wait to get into it. 

Chunky Pumpkin Spice Granola ~ ElephantEats.com

Nice big chunks!

A present that I gave rather than received, however, is this Pumpkin Spice Granola. My mother-in-law eats granola for breakfast every single day (you can see where Nate gets his routine eating habits from) and she told me that she specifically likes nuts and seeds in her granola but no dried fruit, and that she likes the kind that has big clumps. According to her, this combo is quite hard to find, so I thought making her some would be the perfect Christmas present. 

I also gave her one of the awesome paperweights we made when we went glass-blowing for Nate’s bday present. I forgot to tell  you guys about that! 

We went up to Beacon, NY to this awesome little shop call Hudson Beach Glass. For Nate’s bday I got us a lesson to do together, which really involved each of us separately making a paperweight while the other person watched.

Hudson Beach Glass glassblowing lesson ~ ElephantEats.com

Nate went first. We were allowed to chose the style of paperweight we wanted, and we both chose the kind that has that swirl inside.We got to choose 2-3 colors to swirl. Nate chose red and gold, while i chose purple, blue and green. The pic of him above is putting the first color on his glass. Because he only chose two colors, he had to put a white background color so those colors would stand out better.

And here’s me with my three colors.

Hudson Beach Glass glassblowing lesson ~ ElephantEats.com

After the colors go on and you melt them in the hot furnace, you twist them together:

Hudson Beach Glass glassblowing lesson ~ ElephantEats.com

After twisting the colors together, you smooth the glass out using this wooden cup so it ends up round.

Hudson Beach Glass glassblowing lesson ~ ElephantEats.com


Hudson Beach Glass glassblowing lesson ~ ElephantEats.com

And here’s Nate’s finished piece right before it went in the oven to slowly “cool” from the super hot temp it was to, eventually, room temp. You can’t see the true colors until it has cooled. The red you see now is mainly the hot glass that would eventually become clear.

Hudson Beach Glass glassblowing lesson ~ ElephantEats.com

So pretty, right?!

It was super fun and our teacher, Kathleen, was so knowledgeable and cool. I highly recommend it! Sorry I didn’t take a pic of the finished paperweights but they looked kind of like this but multicolored in the colors we chose.

But back to my granola! I read that the trick for clumpy granola is to add an egg white before baking and not to stir it! Halfway through I gave the giant clumps a flip and then just left it alone. Obviously you can alter the ingredients you put in this (dried fruit, more or less sugar, etc). 

Chunky Pumpkin Spice Granola ~ ElephantEats.com

 It’s great served with yogurt or milk! 

Chunky Pumpkin Spice Granola
Yields 6
A chunky seed and nut granola with spiced pumpkin flavor!
Write a review
Print
Ingredients
  1. 3 cups quick oats
  2. 2 tsp pumpkin pie spice
  3. 3/4 tsp salt
  4. 3/4 cup brown sugar
  5. 3/4-1 cup pumpkin
  6. 2 Tbsp oil
  7. 1/2 cup maple syrup
  8. 1 tsp vanilla extract
  9. 3/4 cup chopped pecans (not toasted)
  10. 2/3 cup sliced almonds
  11. 1 egg white, lightly whisked
  12. 3/4 cup sunflower seeds, roasted (if you can find unroasted then add them along with the nuts)
Instructions
  1. Preheat oven to 325 and line a large baking sheet with parchment paper.
  2. In a large bowl combine everything except nuts, egg white and seeds.
  3. When thoroughly mixed, add in nuts and egg white and mix well. You can add the seeds now too if you managed to find raw/unroasted seeds.
  4. Spread everything out onto the prepared baking skeet in an even layer.
  5. Bake for 30 minutes then flip the granola over, taking care not to break it into pieces more than necessary.
  6. Sprinkle seeds onto granola and bake an additional 20-25 min or until crisp and golden. Remove the outer crispy pieces as necessary to prevent them from burning. The largest pieces may still seem slightly chewy inside but they will crisp up when they dry.
  7. Remove pieces to a wire rack over a baking pan to catch the smaller pieces. Once cooled, break granola up as desired into smaller pieces. Store in an airtight container.
Notes
  1. Great topped with yogurt or milk!
https://elephanteats.com/

Sorry I’ve been on an extended blogging break. We went down to my mother-in-law’s for Christmas and since I had leftover vacation days, I decided to take off the whole week of Christmas through New Years so I could just relax and enjoy my time there. This also meant that I barely picked up a computer.

I’m so behind on reading and commenting on other blogs, so if I haven’t been to your blog in a while, that’s why. I will catch up soon hopefully!

I’ll be back with a new recipe in the new year but for now I’ll leave you with a countdown of my top 10 recipes of 2013, based on how often they’ve been viewed. Enjoy and have a safe and happy holiday!


10) Goat Cheese, Chard and Herb Pie in a Phyllo Crust– I can’t take credit for creating this pie, but it’s a good one!

Goat Cheese, Chard and Herb Pie ~ ElephantEats.com


9) Brothy Black Bean Soup– I guess I’m not the only one that prefers brothy soups to thick ones! It’s the garnishes that make this soup.

Black Bean Soup ~ ElephantEats.com


8) Chicken and Chorizo “Paella” with Mushrooms– a quick version of paella that’s made in one pot! A perfect weeknight meal.

Chicken and Chorizo "Paella" ~ www.ElephantEats.com


7) Turkey, Pumpkin and Veggie Chili– this recipe got quite a few views during the colder months. There are so many good chili recipes out there, but I hope you’ll give this one a try :)

Turkey, Pumpkin and Veggie Chili ~ ElephantEats.com


6) Red Wine Chocolate Cake– when you combine red wine and chocolate, you know it’s going to be something good. This is super easy to make and definitely tastes like wine!

Red Wine Chocolate Cake ~ ElephantEats.com


5) Peppermint White Chocolate Swirl Cheesecake Bars– I posted these in December and they were my 5th most viewed page before the end of the month!

Peppermint White Chocolate Swirl Cheesecake Bars ~ ElephantEats.com


4) “Buffalo” Chicken Salad Sandwiches– I came up with these after going through one of my many put-buffalo-sauce-on-everything phases.

"Buffalo" Chicken Salad Sandwiches ~ ElephantEats.com


3) Stir-Fried Spicy Rice Cakes with Pork and Mushrooms– If you’ve never tried rice cakes like these, you need to get to your nearest Asian market and get some. So chewy and delicious!

Stir Fried Rice Cakes ~ ElephantEats.com


2) Light Carrot Dill Cream Sauce– I came up with this recipe when I was trying to use up the dill in my fridge and somehow it made it onto the Recipe.com site!

Light Carrot Dill Cream Sauce for Pasta ~ ElephantEats.com


1) Zesty Roasted  Pumpkin Seeds– not sure if this was popular because of my pumpkin carving or the seeds, but it went crazy on Pinterest.

Zesty Roasted Pumpkin Seeds ~ ElephantEats.com

Mom's Barbecued Meatloaf ~ ElephantEats.com

With all the cookie making and eating going on around this time of year, it’s important to still remember to eat regular, healthy meals. 

Not that I’m judging you…trust me, I’ve eaten cookies for an appetizer or for dinner on more occasions than I can count (*cough* yesterday *cough*). But I always end up making myself sick and being hungry an hour later. 

So with all the cookie and dessert posts on all your favorite food blogs right now, I thought it was my duty to give you something to make for dinner. You and your family will thank me, I promise. 

Mom's Barbecued Meatloaf ~ ElephantEats.com

This meatloaf isn’t just any meatloaf. It’s the one my mom made when I was growing up. It brings back so many memories when I smell it baking away in the oven, and when I take my first bite it transports me back to my carefree days of childhood…when I wasn’t the one who had to cook dinner ;) (thanks, mom!)

This can be made with any meat you want. Growing up my mom sometimes used lean ground beef and sometimes ground turkey. Now I make it only with turkey because Nate doesn’t like beef. This isn’t your typical dry, gross meatloaf (although Nate would probably like that), it is very moist and has the most delicious sort of sweet and sour tomato sauce that goes over it. I can eat that sauce with a spoon (and do), it is that good.

Mom's Barbecued Meatloaf ~ ElephantEats.com

So do yourselves a favor and make this for dinner tonight. Just make sure you leave enough time since it does need to bake for over an hour. It’s worth it though!

This was definitely one of my favorite dinners when I was younger. Now, Nate begs me for this meal on a regular basis, and I’m so glad it’s become one of his favorite meals too. It’s delicious when served alongside some homemade mashed potatoes and green beans :)

Mom's Barbecued Meatloaf ~ ElephantEats.com

Mom's Barbecued Meat Loaf
Serves 4
This is a moist meat loaf with a delicious sweet and sour tomato sauce. I have no idea what the origin of this recipe is, so as far as I'm concerned, it's from my mom :)
Write a review
Print
Ingredients
  1. 1.5 lb ground beef, veal or turkey (i usually use 1.25 lbs because that's how big the containers of ground turkey are, and it's even better because there's more sauce)
  2. 3/4 cup bread crumbs (Italian style are great, or panko works fine too if that's what you have)
  3. 1 onion, minced
  4. 1 egg, lightle beaten
  5. 1 1/2 tsp salt, dash of pepper
  6. 2 cups of your favorite jarred tomato sauce
  7. 3 Tbsp brown sugar
  8. 2 Tbsp mustard
  9. 3 Tbsp cider vinegar
  10. 2 tsp worcestershire sauce
Instructions
  1. Preheat oven to 350.
  2. Mix together meat, bread crumbs, onion, egg, seasonings, and 1/2 cup of the tomato sauce.
  3. Form into a loaf and put into pan (a 9x5 loaf pan works best but make sure it is big enough to hold all the sauce, as it will bubble up).
  4. Combine rest of tomato sauce, brown sugar, mustard, vinegar, and worcestershire sauce. Pour over meat loaf.
  5. Bake for 1 hr 15 min, basting occasionally with sauce.
  6. Remove to serving plate. Slice and serve. Pass sauce from pan on the side!
https://elephanteats.com/

Orange Iced Gingerbread Bars ~ ElephantEats.com

This past weekend I had my annual gingerbread house decorating brunch with my friend, Erica. We do it every year, but it has gradually been changing for the better, I think.

The first year we did it we used graham crackers and tried to attach the structure together with icing. Anyone who has attempted a gingerbread house knows that this method works, but only if the structure has a day to dry before decorating it. Since we only had an afternoon, we found out the hard way that royal icing takes a while to set.

Orange Iced Gingerbread Bars ~ ElephantEats.com

The next year I had read online that you could use melted sugar to instantly bind the crackers together. This works awesomely, as long as you’re SUPER careful not to burn yourself on molten sugar. Don’t say I didn’t warn you. We did this for a couple years, but you still have to set aside time to assemble it. 

But this year I decided to just buy a couple of those gingerbread house kits.

gingerbread house kit ~ ElephantEats.com

The kits come with pre-assembled houses, saving us hours of aggravation, and they also come with candy included and an idea for how to decorate. I knew the kit was great because I decorate a house from a kit every year when I go down to my mother-in-law’s for Christmas. 

photo 2

Anyway, it ended up being perfect. We had a tasty brunch that Erica prepared and then got to spend a couple hours decorating our houses. I think Erica did a much neater job with the icing, but it was fun nonetheless.

Gingerbread Houses 2013

Today’s recipe is related because it’s for gingerbread bars! Not only that, but I literally think they’re the best thing to come out of my kitchen this year…and that’s saying a lot since it’s now December.

Orange Iced Gingerbread Bars ~ ElephantEats.com

These bars are spicy from the molasses, have tons of flavors from all the spices and have the ooey gooey texture of the perfect brownie. I chose to add some orange juice and zest too, because for some reason i feel like gingerbread goes really well with that citrus flavor.

Basically, you NEED to make these. They taste like the holiday season :)

Orange Iced Gingerbread Bars ~ ElephantEats.com


Orange Iced Gingerbread Bars
Yields 9
A spicy, citrusy, dense and chewy gingerbread bar!
Write a review
Print
Ingredients
  1. 1/2 cup (1 stick) unsalted butter, melted and slightly cooled
  2. 1 large egg
  3. 1 cup light brown sugar, firmly packed
  4. 1/2 cup unsulphered light or medium molasses
  5. zest of 1 orange, divided in 2 (will be about 1 Tbsp total)
  6. juice of 1 orange (will be used in both bars and icing)
  7. 3 teaspoons ground ginger
  8. 2 teaspoons cinnamon
  9. 1 teaspoon ground cloves
  10. 1 teaspoon ground nutmeg
  11. 1 1/4 cups unbleached all-purpose flour
  12. 1 teaspoon unsalted butter, melted
  13. 1 cup powdered sugar
Instructions
  1. Preheat the oven to 350ºF. Coat an 8x8 baking dish with cooking spray and set aside.
  2. In a large bowl, whisk together butter, egg, brown sugar, molasses, half of orange zest (about 1.5 tsp), 1 Tbsp of the fresh orange juice, ginger, cinnamon, cloves, and nutmeg until smooth.
  3. Add the flour and stir until just combined, don't over mix.
  4. Pour the batter into the prepared pan and smooth the top. Bake 32-34 minutes or until a toothpick inserted in the center comes out clean or with moist crumbs clinging. Allow the bars to cool while you prepare the icing.
  5. In a small bowl, combine melted butter, powdered sugar and rest of orange zest. Add orange juice (you will only need about 1 Tbsp plus 1 tsp) a little at a time until it reaches a smooth, pourable consistency. Pour evenly over cooled bars. Cut and serve.
Notes
  1. Best served at room temperature.
Adapted from The Live in Kitchen
https://elephanteats.com/