Tomato Rosemary Focaccia ~ ElephantEats.com

Nate and I headed down to his mom’s last weekend, as we usually do when we have 3 days off. I decided to undertake a bunch of recipes that take longer than I typically have. I thought it was a perfect time to get into some yeasty things.

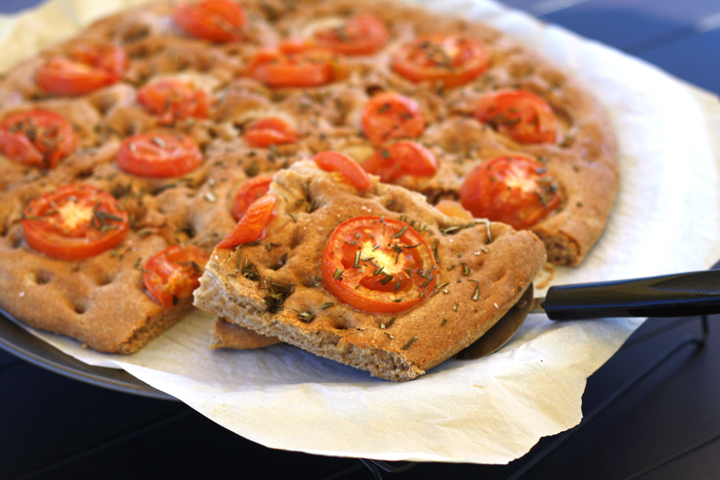
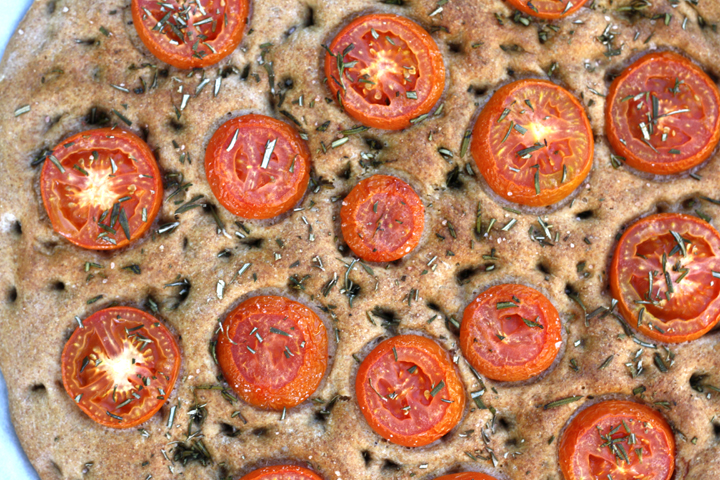
I had marked down a couple recipes, one for a cinnamon braid bread that I decided to make for breakfast, and the other was a Tomato Rosemary Focaccia Nate found in the NY Times. Nate loves focaccia so I’ve been wanting to make it for him. This particular recipe was “healthy” because it had mostly whole wheat flour.

Tomato Rosemary Focaccia ~ ElephantEats.com

While I waited for the dough to rise, I headed outside to pet the neighbor’s cat. He really seemed to like me, and after about 5-10 min of petting, I decided to come back inside. It was a little chilly and I was in my p.j.’s Well, the cat decided he wasn’t done being pet, so he followed me. No matter what I did, I couldn’t get him to leave me alone, and I didn’t want him to get near my mother-in-law’s house because she has two dogs inside that don’t like cats.

I finally was able to trick him and quickly ran in the front door and shut it. It seemed like the coast was clear until I saw him poke his head in the window. He was looking for me!

IMG_7716

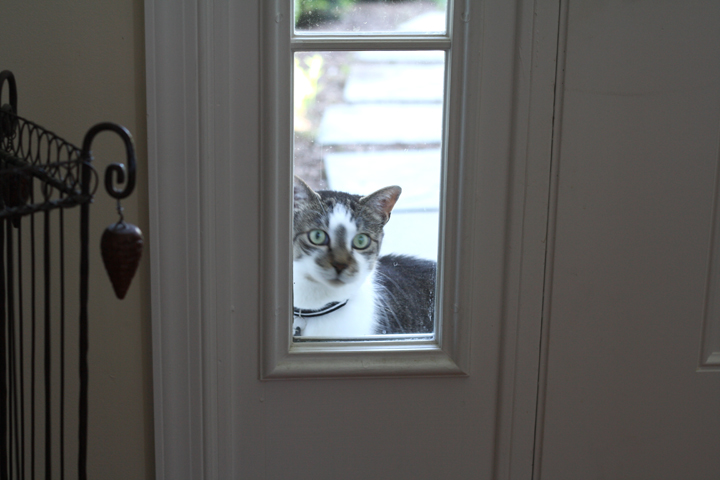
He stayed on the front porch for about 15 min, meowing and pawing at the window. When I didn’t come back out, he then went to the back door and meowed there too for another 15 min. I felt so bad!

Finally, after about 30 min of this, I went outside and walked him back to the neighbor’s house. They were about to leave and were in the driveway, so they took him and put him inside. Phew. And I thought my cat was needy! Nate threatened to tell L.C. when we got home that I “had an affair with a floozy.”

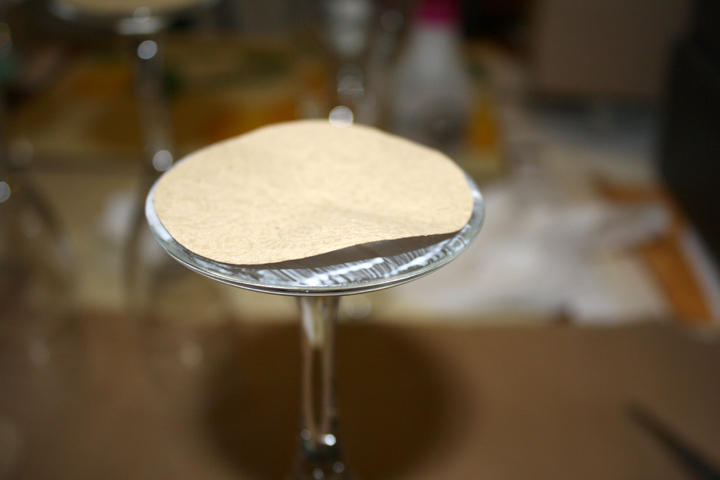
But back to the food. Nate loves whole wheat breads, but I’m not as much of a fan. I find them a little on the dry side, and this focaccia was no exception. That’s not to say it wasn’t good, but you could definitely tell it was made with whole wheat flour. If I’m going to splurge on bread/pasta, I want it to be white flour all the way!

It sure was pretty, though.

Tomato Rosemary Focaccia ~ ElephantEats.com

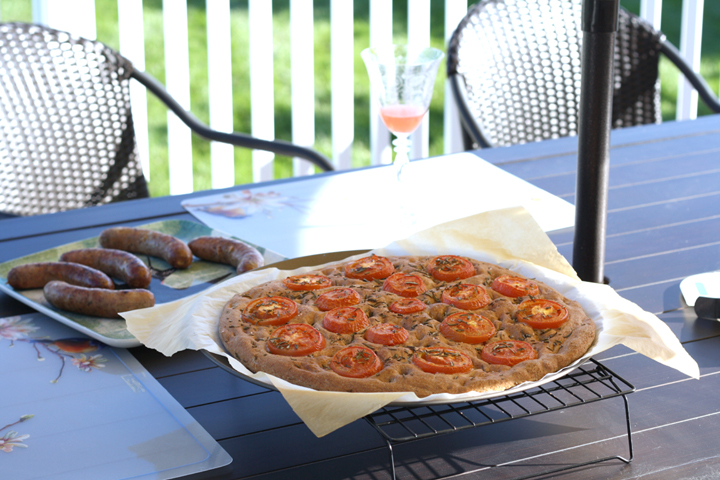
We had ourselves a nice outdoor dinner. There are few months of the year when I’m willing to eat outside. Usually it’s too cold, or mosquitoes are everywhere (mosquitoes happen to LOVE me).

IMG_7735

Anyway, we had a perfect, sunny evening with a nice breeze.

IMG_7738

Nate’s mom grilled up some chicken sausage and veggies and we served the focaccia alongside it.

Tomato Rosemary Focaccia ~ ElephantEats.com

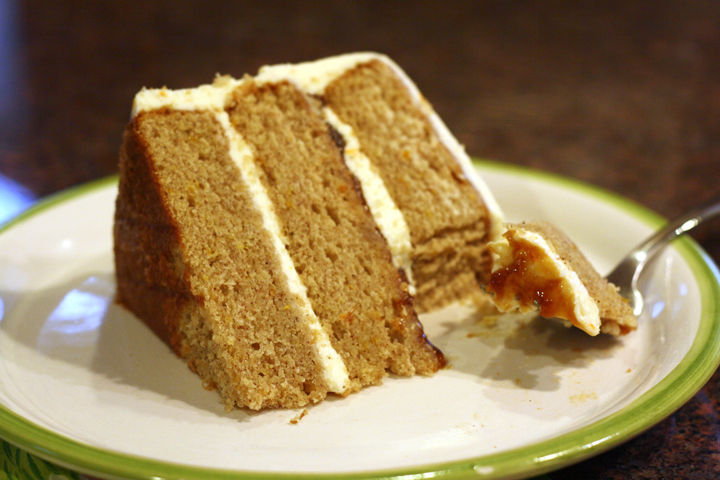
I made a chocolate pine nut tart for dessert that was as amazing as it sounds, but the recipe needs a little tweaking before I can share it. I followed the directions but ended up having to split it into two pans because there was too much crust and filling.

We had an awesome Memorial Day. I can’t believe the 4th of July is only a month away! Where has this year gone?

For the focaccia recipe, you can get it from the NY Times site here.


I’ll be back with a recipe soon, but today it’s Pinterest Challenge Time!

Two of my favorite DIY blogs do something every season called the Pinterest Challenge. The goal of this challege, is to make one thing each season that’s inspired by all the gorgeous stuff that we’ve pinned on Pinterest! It keeps us from continually pinning things and never doing anything about them.

This month, the challenge is hosted by: SherryKatie, Emily and Renee.

Because I just can’t wait to share with you til the end of the post, here is my finished, custom-initialed champagne glasses!

Custom Etched Champagne Glass ~ ElephantEats.com

You may remember I’ve participated in this challenge several times so far:

  • In the winter I made a lovely button bird for Nate’s mom’s Xmas present

  • This fall I made a flower girl sign for my wedding :) – my favorite one to date

FlowerGirlSign

Although it’s been a while since I made this new project, it was part of my Christmas present to my mother-in-law again. That’s my favorite time to get crafty!

Every Christmas and New Years, Nate’s mom breaks out some champagne for us all to celebrate. I thought that it would be really nice if I made her some personalized champagne glasses, one for each of us with our first initial on it and a glitzy gold bottom.

I actually combined two different pins/ideas for this project.

First I found this pin where someone added a gold doily to the bottom of a basic glass:

14 Gilded Lace Champagne Glasses

Second, I had seen a bunch of projects where people etched glass for various purposes, such as spice jars.

Spice jars

Ok, so the first thing I did was go to Target and buy two cases of the cheapest champagne glasses they had. They were $10 for 6 glass, I believe.

Then I searched far and wide for a gold doily, but I couldn’t find them anywhere, so instead I bought some gold patterned scrapbook paper.

This definitely wasn’t the best idea. The gold doily was much more delicate and could easily bend to the slight curve under the champage glass, but the paper was stiff. The paper was a lot harder to work with, but I managed.

First I traced the bottom of the glass onto the pretty paper:

IMG_6847sm

and cut it out.

IMG_6850sm

Next you put a layer of Modge Podge on the glass, put on the paper and smooth it out well.

Then put another layer of Modge on top of the paper. I then let it dry and put another few layers of Modge on top (letting each dry in between), just to make sure it was fairly water-tight.

Obviously you’ll still have to handwash the glasses, but at least I wouldn’t worry if a little water got on the bottom now.

IMG_6851sm

For the etched initials, I could have taken the easy way out like my inspiration pin and found a stencil, but of course I had to be all complicated like the idiot I am. Truthfully, I just couldn’t find a stencil in the right font/size I had in mind.

I was looking up pretty fonts to use, but I had an idea in mind that I wanted the letter to be very gothic, kind of like this:

But the more I thought about it, I realized how hard it would be to cut those shapes out to make a stencil, so I searched a little more for a font I thought was sophisticated and kind of said “holiday.”

I eventually found this free font called the RM Wreath font on this awesome free font site.

wreathNimage

Very festive, no?

So I followed the directions of another glass etch site- buy that contact shelf liner you buy at any hardward store that’s sticky on one side. *Make sure it’s the kind that’s sticky on one side! They do make one that’s not.

Then you print out the font you want at the right size and use an exacto knife to cut out the liner so the letter (or design) is empty space. This is the part that will get etched.

I had to simplify it a bit since I had to cut it out with an exacto knife. My mom suggested removing the bow since the first try with it didn’t look like a bow. I instead made a kind of abstract wreath.

IMG_7015sm

Basically after cutting it out, you stick it on the glass then follow the directions of the etching cream bottle. I used Martha Stewart’s brand since it was all I could find at Michaels, although it was probably more $ than it should have cost. You just put on a thick layer of cream, let it sit 15 minutes, then wash it off. Simple as that!

I had to do this in three parts- 1) wreath stencil then etch 2) letter stencil then etch 3) berries the etch

It was kind of a pain but in the end, all the etching went by fairly quickly and it was fun to wash off the etching cream and see the glass etched :)

And voila! the finished product:

Custom Etched Champagne Glass ~ ElephantEats.com

It’s hard to see the berries in and around the wreath because all you can see are the champagne bubbles, but I promise they’re there.

Custom Etched Champagne Glass ~ ElephantEats.com


It was a decent amount of work to do this, but only really took me a few evenings becauese of a lot of drying time and a low attention span ;)

Spice Cake with Orange Cream Cheese Frosting ~ ElephantEats.com

Pardon my lack of posts. There have been so many changes happening in the Elephant Eats household, making me a bit busy and causing me to have insomnia. I’ve been waking up at like 3 or 4 in the morning with my mind racing about various things…hence my finishing up this blog post at 4am. Surprisingly I haven’t been as tired as I would imagine the next day. I guess adrenaline will do that to you!

The house hunting thing is stressing me out a bit. Like how do you know when you like a house enough to want to buy it and that something better won’t come along? I’m obsessively combing the listings on a daily basis.

Spice Cake with Orange Cream Cheese Frosting ~ ElephantEats.com

This past weekend was super busy. It started with a little house hunting Saturday morning with a realtor. It made me realize how expensive things are for how little you get in this area. I’m hoping there will just be something that I fall in love with (that’s in our budget).

Then I rushed off to my friend Emily’s bridal shower and bachelorette! She was one of my maids of honor and I’m one of her bridesmaids. I, along with the other two bridesmaids, planned the whole shower/bachelorette weekend. We put a lot of hard work into it and I think it came out great and went off pretty much without a hitch!

Spice Cake with Orange Cream Cheese Frosting ~ ElephantEats.com

Plus, Emily told us she loved every second of it :) We did any Asian-themed shower because she loves sushi. I got some hanging paper lanterns in her wedding colors to decorate her soon-to-be sister-in-law’s house. They looked great! I unfortunately was too lazy to upload the photos but maybe I’ll add them soon.

The bachelorette went late into that evening and ended with a sleep over. I didn’t get much sleep and was up early to go house hunting some more on Sunday!

Spice Cake with Orange Cream Cheese Frosting ~ ElephantEats.com

Nate told me he doesn’t care at all about the house and that it’s totally up to me. I guess he trusts my judgement.

It was so fun to go in all the houses, and driving around the suburbs on a gorgeous spring day made me dread going back to the city.

This is all completely unrelated to this recipe. I made it when we were down in PA two weekends ago, and it was a perfect way to end to our Easter dinner! (pardon the photos, as they were taken after daylight and I didn’t have my trusty food photography lights!)


Spiced Layer Cake with Orange Cream Cheese Frosting

very slightly adapted from Bon Appetit (11/09)

Print this recipe!

Makes one 3-layer cake

1 teaspoon baking soda
1 teaspoon baking powder
1 teaspoon ground ginger
1 teaspoon ground cardamom
1 teaspoon ground cinnamon
1 teaspoon ground nutmeg
1/2 teaspoon salt
2 cups sugar
1 cup (2 sticks) unsalted butter, room temperature
1 tablespoon grated orange peel
4 large eggs
1 cup sour cream
1/2 cup whole milk
1/2 cup orange, peach or apricot jam
Orange Cream Cheese Frosting (recipe below)*

Preheat oven to 350°F. Butter three 9-inch-diameter cake pans. Line bottom of pans with waxed paper. Butter and flour pans; tap out excess flour. Sift first 8 ingredients into medium bowl. Using electric mixer, beat sugar, butter and orange peel in large bowl until fluffy.

Beat in eggs 1 at a time. Stir flour mixture into butter mixture alternately with sour cream and milk. Divide batter among prepared pans.

Bake cakes until tester inserted into center comes out clean, about 25 minutes. Transfer pans to racks and cool 10 minutes. Turn cakes out onto racks and cool completely. (Can be made 1 day ahead. Store airtight at room temperature.)

Place 1 cake layer on platter. Spread 1/4 cup jam and then 2/3 cup frosting over. Top with second cake layer. Spread rest of jame and then 2/3 cup frosting over. Top with third cake layer. Cover top and sides of cake with remaining frosting. (Can be made 1 day ahead. Cover with cake dome and store at room temperature.)

Orange Cream Cheese Frosting
2 8-ounce packages chilled cream cheese
8 tablespoons unsalted butter, room temperature
2 cups powdered sugar
2 teaspoons grated orange peel
1 teaspoon vanilla extract
1/3 cup chilled sour cream

Using electric mixer, beat cream cheese and butter in large bowl until well blended. Beat in sugar, then orange peel and vanilla. Beat in sour cream. Cover and refrigerate until frosting is firm enough to spread, about 30 minutes.

*note that I found the frosting barely covered the cake. In making this again I might 1 1/2 the recipe.

Vegetarian Stuffed Mushrooms ~ ElephantEats.com

We headed down to my mother-in-law’s for the long Easter weekend. Since Nate was in California for a couple months, we hadn’t been down since Christmas and it was nice to just relax and eat tons of yummy food.

Tired Haley

Nate’s mom totally spoils us and we both got giant Easter baskets filled with our favorite candy. She got me Peeps!!!

Peeps are yummy

We also dyed some Easter eggs. This here is our easter egg family. Do you see the resemblance?

Easter Egg Family

The paw print one was Nate’s representation of L.C….not bad.

But I think my version of Nate was pretty spot on ;)

Easter Egg Beardo

Since Nate’s mom was going to cook a big meal for us for Easter dinner, I decided to make a yummy appetizer for the night before. This is another of those recipe’s from the recipe box I got handed down from my mom. I remember her making these for dinner parties and some catering too.

Vegetarian Stuffed Mushrooms ~ ElephantEats.com

They’re super easy to make and only take 10ish minutes to cook! You can totally make them ahead of time and they can sit out til you’re ready…or you can probably even make them the day before if you really want, and just keep them in the fridge.

Definitely keep this recipe on hand for your next dinner party or just to make your weeknight dinner a little fancier :)

Vegetarian Stuffed Mushrooms ~ ElephantEats.com

Stuffed Mushrooms

From mom’s recipe box

Print this recipe!

Serves 8-10 (can easily be halved with no probs)

25-30 lg. mushrooms, stems removed
2 cups sourdough breadcrumbs (i used regular but I think it wasn’t as good)
1/2 cup pesto
1/4 cup pignoli nuts, toasted
3-4 Tbsp fresh parsley, finely chopped
3-4 Tbsp fresh basil, finely chopped
1/2 cup vegetable broth
Parmesan cheese for sprinkling on top

Preheat oven to 400.

Combine crumbs, pesto, nuts, parsley and basil. Slowly mix in broth until moist but not wet. Season to taste with salt and pepper.

Fill Mushrooms. Top with cheese. Bake 10-12 min.

*Must serve hot!*

Valentine Sugar Cookie Heart

Before I get into my Valentine’s Day treats, I wanted to share a couple things with you. If you’ve been following me since the beginning, you know that a couple years ago, I catered lunch for Nate and his little film crew while he filmed a short film he wrote, directed, and acted in. It took a long time to finish editing, but I can finally share it with you. It’s equal parts suspenseful and amusing, and I hope you enjoy it :)

Lost Keys from Nathaniel Carota on Vimeo.

(You can also see the video he made for our wedding here.)

The second thing I want to share with you is another doggy painting I completed. I’m really trying to build up a pet portrait side business (see the “Pet Portrait” tab on my page menu). I really want to expand to animals other than dogs, but so far that’s all I’ve done. This one was done in memory of Charlie, who passed away recently from cancer :(

Custom Pet Portrait Yellow Lab

Custom Pet Portrait Yellow Lab

Now onto the recipe…

I know a lot of people aren’t fans of Valentine’s Day. While it’s true that it’s not as exciting of a holiday if you’re unattached, it’s a perfect excuse to eat chocolate no matter what your relationship status :)

There are a couple cookie recipes I’ve been meaning to share. I’ll share one today and one in a few days. The first is a semi-homemade cookie that I found years ago and often use it for beautiful Christmas Cookies. It’s a cut-out sugar cookie, but because it’s an upgrade to a powdered mix, you can spend more time decorating and less time measuring out ingredients! Also, the texture is such that you don’t even need to refrigerate before rolling out.

Valentine Sugar Cookie Heart

I usually use it with regular royal icing and decorate pretty snowflakes and santas for Christmas. This time, however, I used a super easy marbling technique I found on this site. It’s so easy and sooo impressive looking!

Since I won’t get to be with Nate this Valentine’s Day, I sent him these in a little care package with some toffee blondies. The blondies were a recipe I made for the first time and they were SO good, but I didn’t photograph them, so I’ll have to make them again sometime soon for you.

Make these cookies for someone you love today!

Semi-Homemade Roll Out Sugar Cookies

From Sandra Lee

Print this recipe

makes 4 dozen small cookies or 2 dozen larger

17.5-ounce package dry sugar cookie mix
4 ounces cream cheese, softened
2 eggs
1 teaspoon vanilla extract or other flavoring
1 cup all-purpose flour

royal icing (recipe below)

Preheat oven to 350 degrees F.

Combine the cookie mix with the cream cheese until crumbly. Mix in the eggs and flavoring until well combined. Add enough flour to make a firm dough that can be rolled out. Refrigerate briefly if too sticky.

Roll dough out on lightly floured board to 1/4-inch thickness. Cut out hearts or other desired shapes.

Place on ungreased baking sheet and bake for about 8-10 minutes.

Make royal icing. When cookies are cool, ice cookies by following marble technique found here and here.

Royal Icing

from Annie’s Eats

this might yield slightly more than you need, but it’s better to have too much so you don’t have to match the color when you make more.

Ingredients:
4 cups powdered sugar, sifted
2 tbsp. meringue powder
5 tbsp. water

Combine all ingredients in a bowl. Whisk until the sheen has disappeared and the icing has a matte appearance (or use a stand mixer.

Transfer the contents of the mixing bowl to an air-tight container. This will be the stiffest consistency of the icing, and at this point it is still too stiff to use for decorating.  Add water a very small amount at a time and stir by hand until fully incorporated.  Continue until the icing has reached a consistency appropriate for piping.  (Remember, if you are having any difficulty piping, it is still too thick.  Add a little more liquid and try again.)

Using a pastry bag, pipe around the edges of each cookie.  Let stand so the icing will set.  Make sure to keep the leftover icing covered at all times when not in use so that it does not begin to harden.

Once all the cookies have been edged, transfer some of the remaining icing to a separate air-tight container.  Thin out by incorporating a small amount of water at a time, until the icing drips off the spoon easily when lifted and then smooths in with that still in the bowl.  If you go too far and the icing is too thin, add more sifted powdered sugar to thicken it again.  Once the icing has reached the desired consistency, transfer it to a squeeze bottle (or a plastic bag with a hole in one corner), and flood the area surrounded by the piping on each cookie.  If it does not completely spread to the edges, use a toothpick to help it along.  Pipe on dots in a contrasting color and use a toothpick to drag into hearts. Allow to set.