Cinnamon Roasted Pears over Arugula with Blue Cheese and Balsamic Glaze ~ www.ElephantEats.com

The other day I was reading one of the blogs I follow, Bake Your Day, and she had posted a recipe and reviewed a new butter-flavored olive oil product. I commented on the post saying how good it sounded, and the makers of the oil, Star Fine Foods, was kind enough to reach out to me and send me some samples!!!

Cinnamon Roasted Pears over Arugula with Blue Cheese and Balsamic Glaze ~ www.ElephantEats.com

They not only sent me that flavored olive oil (which I can’t wait to try), but also 2 different flavors of one of their other new products: flavored balsamic glaze!!

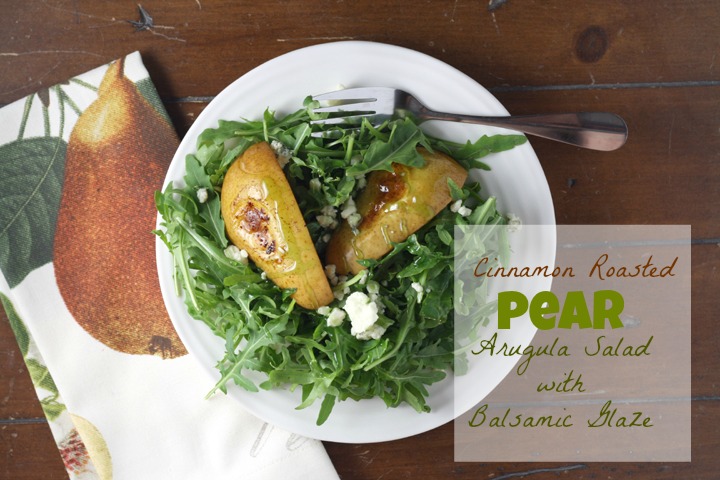
I decided to use the glaze on an autumn update of my favorite summer salad. All summer long I ate watermelon cubes over arugula, with feta or blue cheese, basil, and a balsamic glaze. At the time I used Trader Joe’s brand balsamic glaze because it was the only brand I had ever seen. Well, when I saw that Star Fine foods sent me an Apple Balsamic Glaze I was SOOO excited! I knew it would be a perfect way to transition my summer salad to fall.

Cinnamon Roasted Pears over Arugula with Blue Cheese and Balsamic Glaze ~ www.ElephantEats.com

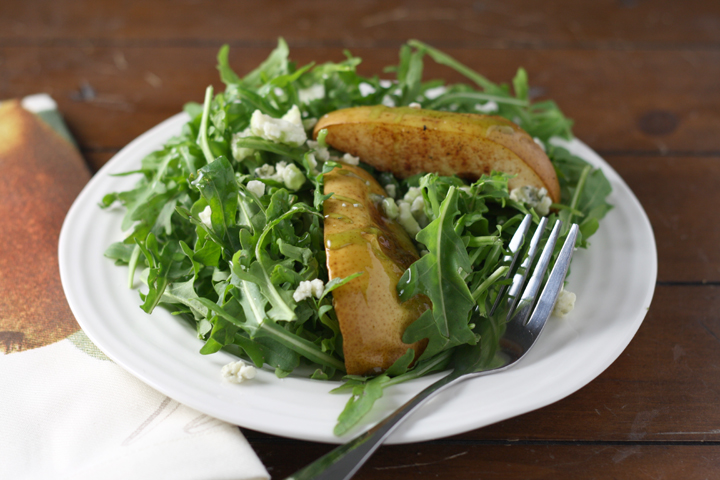
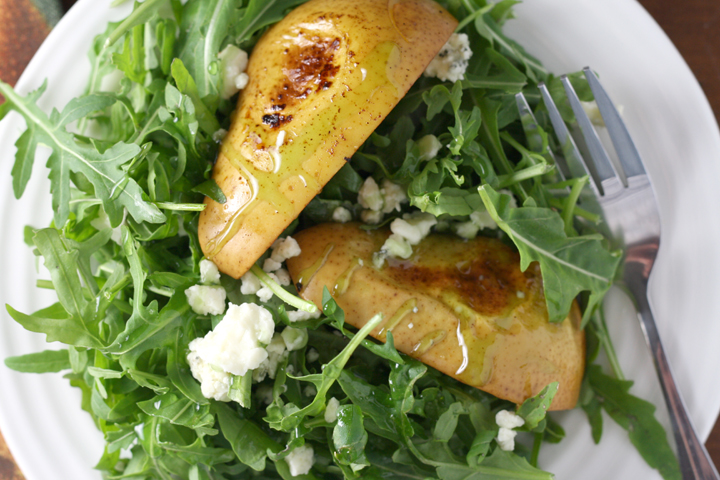
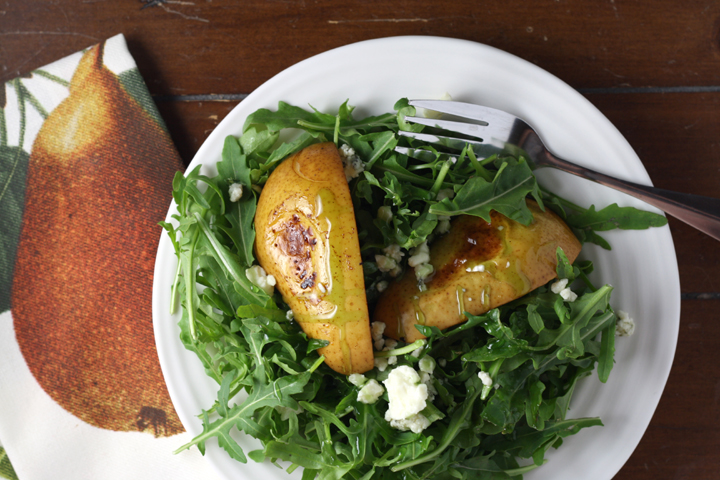
I decided to go with pears for the fall fruit portion of the salad….but not just any pears- cinammon roasted ones! In the summer I love the cold, juicy watermelon, but on a cold day these warm pears are just perfect. They slightly wilt the arugula and soften the blue cheese crumbled on top. The Apple-flavored Creamy Balsamic Glaze added the absolute perfect sweet/tart flavor to go with the juicy pears and bitter arugula. 

I see myself eating this all the time this autumn and it might just be my new favorite salad! I hope it will become yours too :)

Cinnamon Roasted Pears over Arugula with Blue Cheese and Balsamic Glaze ~ www.ElephantEats.com

**I was given these products free of charge, but all opinions are my own. I would never post about a product I didn’t love and plan to use again.

Arugula Salad with Roasted Cinnamon Pears, Blue Cheese and Apple Balsamic Glaze
Serves 4
Warm cinammon roasted pears over a bed of arugula with blue cheese and an apple balsamic glaze
Write a review
Print
Ingredients
  1. 2 pears (I used Bartlett because I think they're the juiciest), not overly soft, cut into quarters and cored
  2. 1/2 tsp cinnamon
  3. 4 cups arugula
  4. 1/4-1/3 cup blue cheese crumbles (depending on how much cheese you like)
  5. 1-2 Tbsp olive oil
  6. 1-2 Tbsp Creamy Apple Balsamic Glaze (or any balsamic glaze if you can't find this one)
  7. salt and pepper to taste
Instructions
  1. Preheat oven to 450.
  2. Spray a foil lined baking sheet with cooking spray. Place pears on sheet, cut side up. Spray pears with cooking spray or drizzle with some olive oil
  3. Sprinkle pears with cinnamon, salt and pepper.
  4. While pears cook, divide arugula onto 4 plates.
  5. Bake pears for 30 min. Remove from oven and immediately place 2 quarters each over arugula on each plate. Drizzle with blue cheese, oilve oil, and balsamic glaze. Salt and pepper to taste.
https://elephanteats.com/

The weather in NYC is finally starting to feel like it should for this time of year. I’ve had to wear long sleeves AND a jacket, when I only needed one or the other up til now. And I’m loving it!

The leaves are changing, the air is crisp and it smells so good out! Nate and I went up to New Paltz this past weekend to go rock scrambling and the leaves were totally gorgeous. It was quite a hike up to the top, but when we got there, the view was absolutely worth it…

…don’t you think?

Despite working up a sweat during the climb, as soon as we got back to normal walking I was chilled to the bone. Weather like this makes me crave a thick, steaming bowl of something comforting. I’ve been wanting to make chili but Nate doesn’t like beef and we both love vegetables so much that I decided to go vegetarian all the way :)

I have to say that this came out a bit less “meaty” than I typically think of chili, but it was good none-the-less. I think perhaps adding more beans would have bulked it up and improved on the lack of meat, but I’m not a huge fan of beans.

You can totally customize this by adding whatever veggies you want. I bet anything would be delicious! I served mine over pasta because Nate needs something besides veggies to fill up his belly…and I happened to have some pasta in the fridge. Over rice would be great too.

*Disclaimer: if you live in a teeny apartment like mine, your whole place will smell like chili for the next week.

Smoky Vegetarian Chili

Recipe by Me

Print this recipe!

Serves 8

Ingredients:

1 Tbsp olive oil
2 large sweet onions, chopped
1 red bell pepper, chopped
1 orange bell pepper, chopped (or red if unavailable)
2 yellow summer squash, diced
3 cloves garlic, minced
1 bunch fresh cilantro, stems and leaves separated but both chopped
10 oz. frozen corn kernels, thawed
1.5-2 cups vegetable stock (i actually used chicken but that obviously would make it non-vegetarian)
Three 15-oz cans diced tomatoes with chiles
One 15-oz can kidney beans, rinsed and drained
2 tsp salt
2 Tbsp chili powder
2 Tbsp ground cumin
1 bottle dark Mexican bear
2 tsp liquid smoke (can be found in all supermarkets)
Sour Cream, shredded cheese, limes, avocado as desired for garnish

Preparation:

Heat oil in large pot over medium heat. Add onions and peppers and saute until they’re beginning to caramelize, about 8 min.

Add squash and garlic, and saute til tender, about 5 min.

Add cilantro stems and tomatoes to pot and bring to a simmer. Add beans, salt, chili powder, cumin, beer and the stock (start with 1.5 cups and add more if you like your chili thinner). Simmer uncovered, stirring frequently until the chili thickens and the vegetables soften, about 30 min.

Garnish as desired, and dig in!

While Nate was enjoying his birthday cake leftovers for days, I was feeling kind of left out on the dessert-front. It’s not that Nate wouldn’t share his leftovers with me, it’s more that I didn’t think I needed to be eating such a high calorie dessert every night…at least until I start working out regularly again :(

But I’m the kind of person that needs a little something sweet after meals. I’m pretty sure I can thank my dad for that nasty little habit.

Anyway, I figured if I made a dessert on the heatlhy side, it would satisfy me plenty while Nate chowed down on cake.

As you know, I still have lots of cider in my fridge, so I thought I’d put it to good use. In my search for cider recipes, I came across one for Cider Poached Pears with a Yogurt sauce. I altered it slightly, based on ingredients I had available, and the result was totally delicious.

And the best part is that when Nate walked into the apartment, he said that it smelled “like cider.” What an awesome natural air freshener! And it even made it feel a little closer to fall :)


Cider-Poached Pears with Honey Yogurt Sauce
Adapted from Curtis Stone

Print this recipe!

Serves 8

Ingredients:

2 cups apple cider (non-alcoholic!)
2 oranges, juice (approx 1 cup), one zested and one peeled, peels reserved
2 cinnamon sticks
1 vanilla pod, split lengthways
4 pears, peeled, halved and cores removed with Parisian scoop (melon baller)
1 containter 2% Greek yogurt
1 1/2 Tbsp honey
1/4 tsp cinammon or more as desired

Preparation:

Put first 3 ingredients in large pot. Scrape seeds out of vanilla bean and add seeds and bean to pot. Bring ingredients to a boil.

Add the pears and cook at a gentle simmer for 10-20 minutes or until a paring knife inserted into the pears meets a little resistance. Cooking time will be determined by the ripeness of the pears.

Remove from heat and allow pears to cool in the poaching liquid.

Once cool, remove pears from liquid and set aside.

Return poaching liquid to medium heat and reduce to a glaze.

In small bowl, combine yogurt, honey and cinnamon.

To serve, slice the pears in quarters from top to bottom, place in the center of four serving plates, spoon over some yogurt and drizzle with glaze.